After creating and downloading a backup of your course (filename.mbz), use these instructions to upload and restore it to a different AsULearn course. See also Course: Import
Restore.... or Import?
Q: When can I use Import instead of the Backup & Restore process?
A: It is always fastest and easiest to use the Import process. But, to use Import, the course has to be available to you currently in AsULearn. That means that it cannot be more than 25 months since the beginning of the semester in which you taught it. Since courses more than two years old are removed from the server, the Import process is not available for them. Basically, if you can find the old course in AsULearn in a past term, you can Import it!
For courses older than 25 months, you'll need to upload and restore the backup you made at the time, and those directions are on this page.
Here's a video walkthrough on how to upload and restore a course backup, with step-by-step directions following below.
Step-by-step guide
- From the main course page, Select More from the Course Menu along the top, then click Course reuse in the dropdown menu.

- The Course reuse page is displayed. From here, you can choose any action related to reusing your course (Backup, Restore, or Import). In this case, select Restore from the dropdown menu at the top left.

The Import a backup file page is displayed. From this page you can Choose a backup file to upload, or just drag/drop it on the window:

NOTE: Only backup files (.mbz file extension) are usable here. Then click the Restore button.Detour!
If a backup you recently made and you wish to restore happens to still be sitting in your User private backup area, you can scroll down a bit and click the Restore link next to it, then continue with the steps below.

- Check the backup details, then scroll down to click Continue at the bottom of the screen.

- CAUTION! Think carefully about the options on this page.
Using the top section, Restore into this course (the course you are currently in) gives you the option to either Merge the backup course into this course or Delete the contents of this course and then restore.- Merge is a good option for protecting any existing materials and content in the course and simply adding your backup file materials. If you repeatedly merge the same backup in the same course, you will get multiple copies of every resource in the course.
- Delete will erase everything first and then restore the backup file so only the restored content remains.
Make your choice, and click Continue.
Alternatively, using the bottom section, Restore into an existing course gives you the option to select (or search for) any other course in AsULearn where you have Teacher role. Note that this list is limited to 10 courses, but you can search at the bottom of the list for any others. If you wish to target the restore to one of the courses in the list, just tick the radio button next to it, make the same Merge or Delete decision as above, and click the Continue button at the bottom of that section.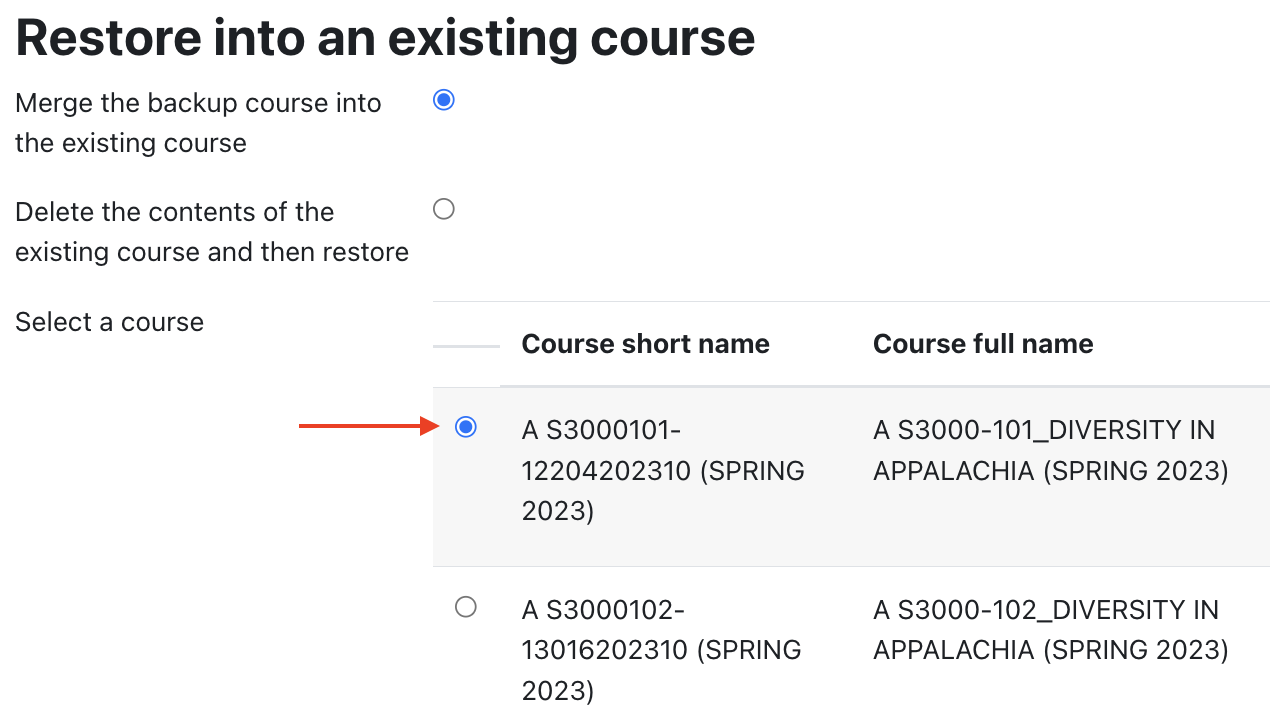
- Scroll down to review the Restore settings, then click Next.
- You'll see an "a la carte" list of all the topics, activities, and resources in the course you are about to restore. Scroll down to review and confirm you have the content you want, then click Next. Or, click Cancel to abandon restoring the course.
- You'll see one final review screen of what you are about to restore (better safe than sorry!). If you're happy, click Perform restore. Or, Cancel to abandon.
- After waiting for the restore process to complete, a success message will display.
- Click Continue and you should see the content has been successfully restored into the selected destination course.
Grab a "Course Eraser!"
Having a "blank" backup comes in very handy when you:
- Restore the wrong course
- Get impatient and merge two courses on top of each other
- Generally just want to "start over" when you're building a course, a reset it to a new blank state
So before you leave, download this backup file of a completely blank, default AsULearn course. You can upload/restore it using the "Delete the contents of the existing course and then restore" option to get a lovely blank slate again: blank_course_backup.mbz