- From your computer, send your print job to either of the following print destinations (this will be the same for all employees on campus):
- ASU-SHARP-BW for Black and White printing
- ASU-SHARP-COLOR for Color printing
Once sent, print jobs will be held in the queue for 24 hours.
If you do not see one of the above options when sending a print job, click the option to see more, or use the drop-down menu to find additional printers and make your selection.
Printing from Google Using the "see more..." option
- Click See more for a list of more print destinations.

- Select a print destination.

Printing from Adobe, Using the Drop-down Menu
Click the drop-down menu to select a print destination.

Printing from Google using the "see more..." option
- Click See more for a list of more print destinations.
- Select a print destination.
Printing from Word Using the Drop-down Menu
Select Print from the File menu, then click the drop-down menu in print settings to select a print destination.
2. Authenticate at the printer by using either your AppCard, Banner ID, or App State username and password.
3. Once you are logged in, you will see the PaperCut main menu with a message indicating pending print jobs. Press Print all to release all print jobs or press Print Release (the button in the middle) to see the full list of pending print jobs:
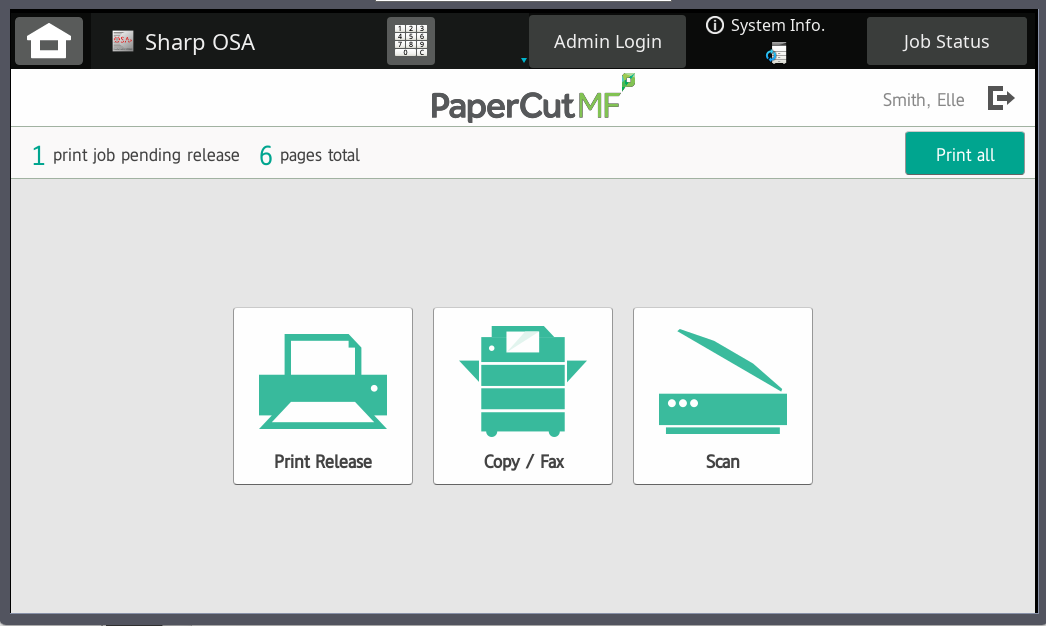
4. If you clicked Print Release, press to select the print job(s) you want to release (a check mark will appear when a job(s) is selected. All print jobs are held for 24 hours if they are not printed).
- You can adjust the print options, such as quantity, for a specific job by clicking the right arrow next to the print job you want to change.
- You can also select print options on this screen such as grayscale for black and white and 2-sided printing (at the bottom of the screen).
- Press the Print button (lower right corner of the screen) to release the print job and print your document (Students will see the print job cost in the print job details header.)
- Press Print, when you are done.

5. Next, press the account that you want to print from. Either a personal student account, or a department account (for Faculty, Staff, Graduate students, and student employees).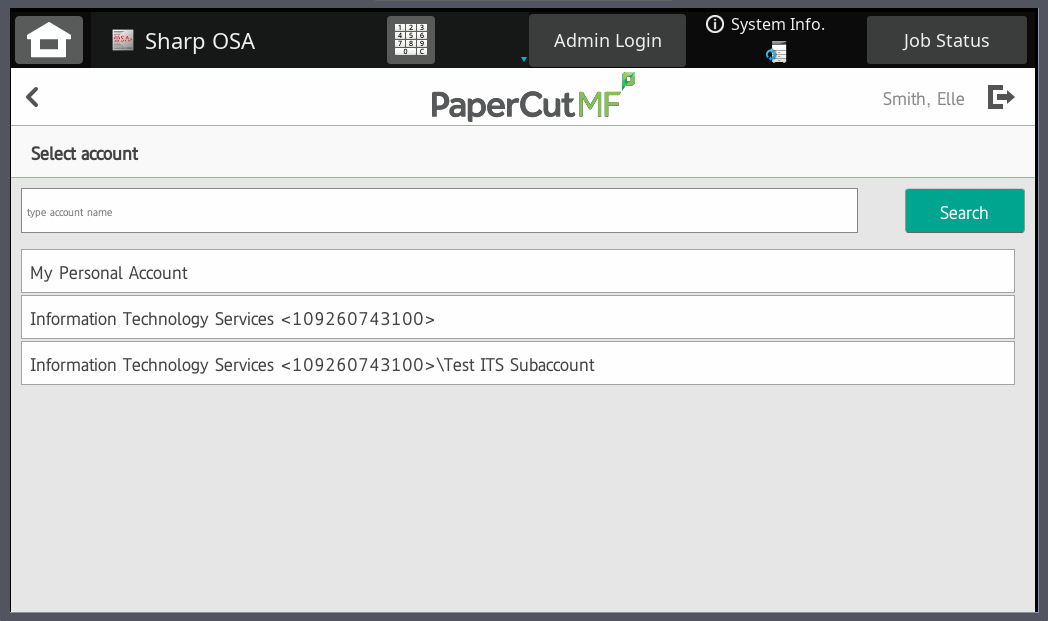
6. After your print job has been released, press the logout icon in the top right of the screen (to the right of your name ) to logout or press the home icon in the top left of the screen to go back to the main screen to copy, fax, or scan.
Important Note:
Student Employees, (and employees that are also students) will have two options when printing.
- Bill their personal funds for school work or
- Bill the employing department/unit for their professional work.
Faculty that report under more than one division, will have options to select which department to bill a printing task.
Using an External Memory Device (USB)
PaperCut Pricing Guide for Students
For pricing information, visit support.appstate.edu/print-copy.