The groups feature allows an instructor to assign students to one or more groups for the entire course or for individual activities. With Group Messaging turned on, members of a group can easily contact all other members.
Within various activities and resources in AsULearn, the Teacher can make particular items individual activities or resources group aware, while not affecting others. It is also possible to force everything in the course to be group aware. If you are not certain about what will work best, please contact your ITC college consultant for additional informationopen an AsULearn support request.Anchor top top
On this page
...
See Moodle documentation on Groups
| Anchor | ||||
|---|---|---|---|---|
|
| Info |
|---|
If you plan to use groups in your course, first be sure to enable them at the course level: From the Course Menu on your course homepage, click Settings:
Click Save and display at the bottom to save your change. Your course is now ready for you to configure and get the most out of groups. Be sure to change settings for gear menu > Edit settings > Groups to enable using groups. |


Step-by-step guide
Widget Connector url https://www.youtube.com/watch?v=U-wueo9RGxA
To create groups in an AsULearn course, follow these steps.
- From the Course Menu on your course homepage, open the drawer by clicking the 3-line hamburger icon (top left), and select click Participants:

- In the Enrolled users dropdown menu at the top left, select Groups:
 Participants from the menu.
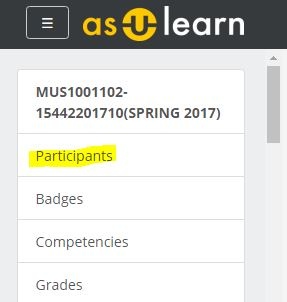
At the top right of the Participants window, click the gear icon, and select Groups from the menu.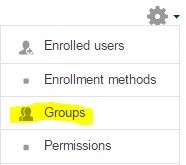
On the Groups page (shown below), there are
3two ways to create
a groupgroups. The following sections
belowdescribe each.
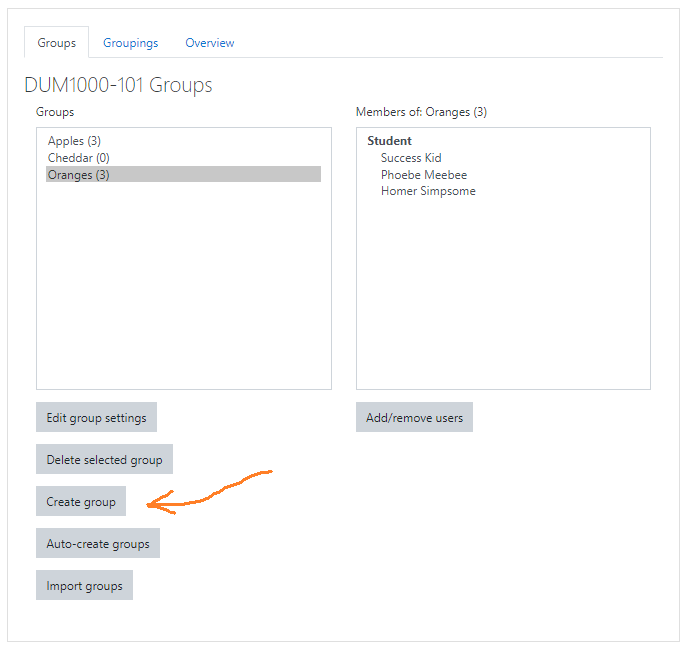

Info The number in parentheses by the Group name indicates how many members are currently in the group. When a Group is selected on the left, the current members are listed on the right.
Create
...
groups manually
- Click Create group button.
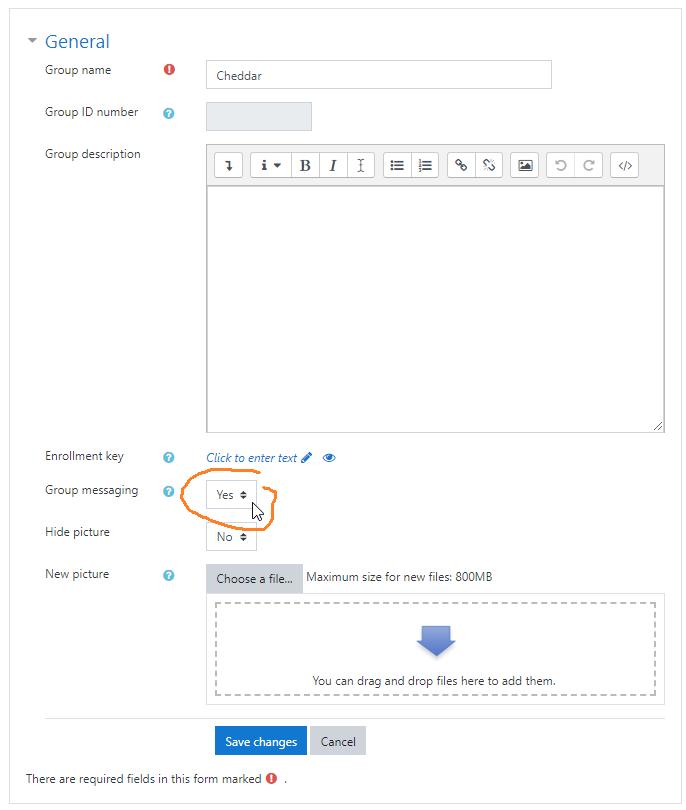

- Type a Group name and an optional Group description.
- Select Yes if you want to turn on Group messaging.
Optionally - you can upload a picture for the group identityUpload an optional Group picture, logo, or avatar.
- Click Save changes. Next, then you will need to Add/remove users to the group (see below).
...
Auto-create groups
- From the main Groups page, click the Auto-create groups button.
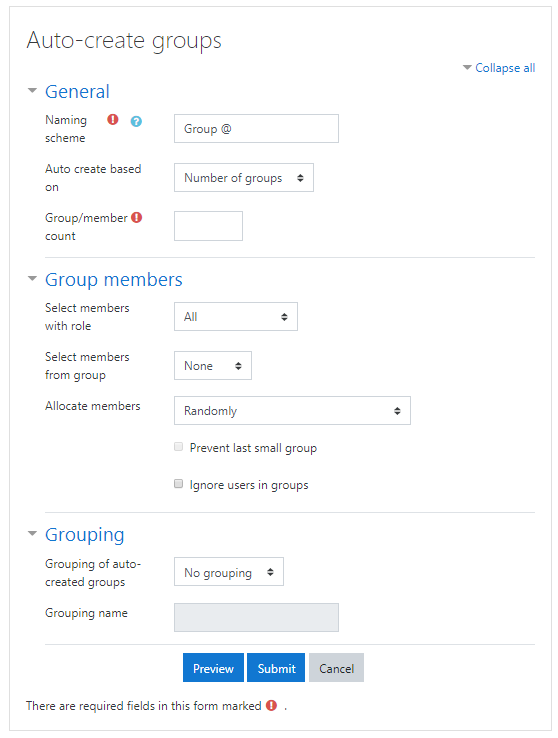

Specify a Naming scheme: enter text with either @ (to enumerate with letters A, B, C...) or # (to enumerate with numbers 1, 2, 3...); example, . Examples: Group @ results in Group A, Group B, Group C...; Team # results in Team 1, Team 2, Team 3...
- Auto create based on: Number of groups (divide the member pool into the number of groups specified in the next field) or Members per group (create groups with the specified number of members in the next field).
- Group/member count indicates the number for your selection in the previous field.
- Select members with role to include All participants in your course (including Teachers) or only those with the selected role.
- Select members from group to create groups from an existing group, ; that is, to create subgroups.
- Select how to Allocate members: Randomly or in order as selected.
- Specify Grouping of auto-created groups: No grouping, an existing grouping, or a New grouping (enter the Grouping name in the next field).
- Click the Preview button to see the groups generated based on your settings displayed at the bottom of the page. Adjust settings if necessary, preview again.
- Click When you are satisfied, click the Submit button to create the groups.
Import groups
...
- , or click Cancel to abandon the process.
| Anchor | ||||
|---|---|---|---|---|
|
...
For groups created manually or by importing, members must be assigned to the groups.
From the main Groups page, click on a Group in the left column, then click the Add/remove users button below the right column.
- Participants in your course that are not already members of the selected group are listed in the Potential members list. Click on a participant's name. If the participant is a member of another group, that group will be displayed in the Selected user's membership column.
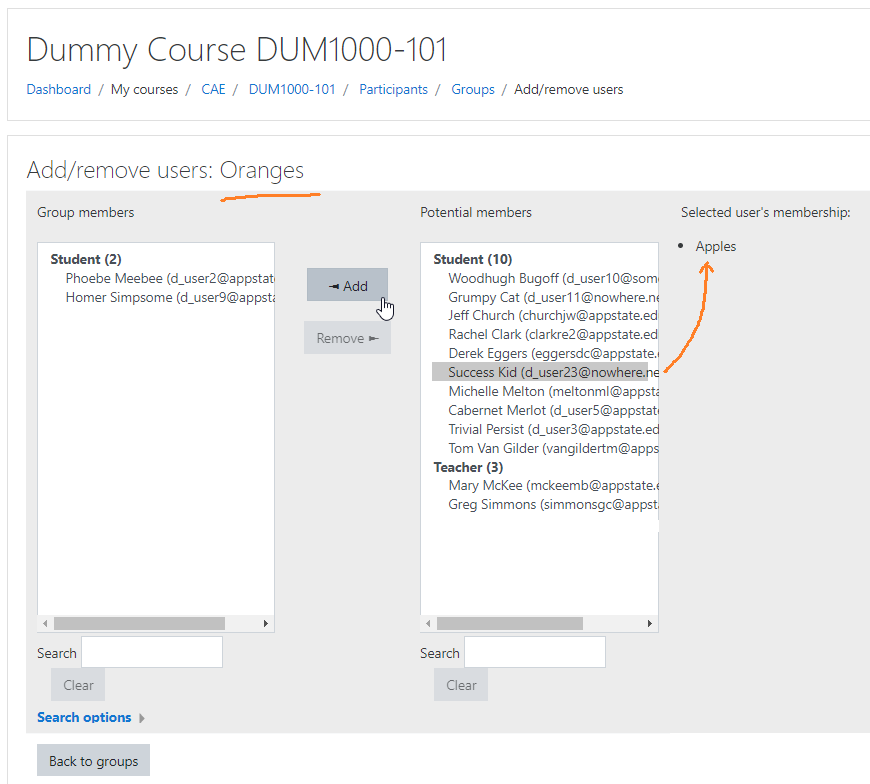

- Selected the desired member(s) (shift/cntrl/cmd-click all work as well). When selected, click Click the < Add button in the middle to add the selected participant(s) to the group.
- Click To remove a course participant from of the group, click on a name in the Group members list and the left, and then click the Remove > to take that course participant out of the group. button in the middle.
back to topDelete an Existing Group
To delete an existing group:
From the main Groups page, click on a Group in the left column (or shift/cntrl/cmd-click to select multiples), then click the Delete selected group button below.

back to topAnchor metacourse metacourse
Metacourse users!
Note for metacourse users who intend to use groups: Before you add course meta links to your master section, you should make a group in your master section (for example, a group called '101' if that's the section where you place your content), and put all the users currently enrolled in that section in that group. The course meta link process will allow you to create and automatically add/maintain the metalinked students from other sections into their own group groups based on section during the course meta link process. To create and addmaintain a group for the Banner-enrolled students in the metacourse, use Metagoup Sync.
| Anchor | ||||
|---|---|---|---|---|
|
Groupings
| Widget Connector | ||
|---|---|---|
|
A Grouping A grouping is a group of groups, that is, a group is a division of groupings; so this taxonomy is created in reverse. . Groups hold users, Groupings hold groups. Groupings are handy when students are members of more than one group in your course, and you have the need to force the set of groups (the Grouping) used by a particular activity or resource, so that students don't participate/submit using the "wrong" group.
- From the main Groups page, open the Enrolled users dropdown menu and select the Groupings tab at the top. Groupings:

- Click the Create grouping button.

- Enter the Grouping name and an optional Grouping description, then click Save changes.

- The Grouping is shown in the table. In Note that in the image below the Apples group has already been added to the Fruit Discussion grouping.
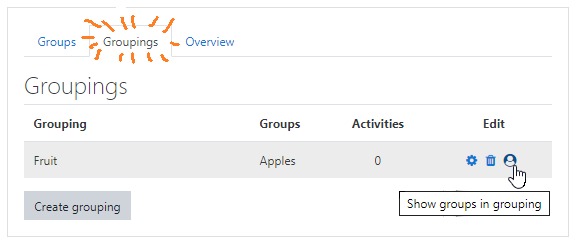

- Click the gear Gear icon on the far right to edit the Grouping (name, description).
- Click the trashcan Trash icon to delete the Grouping. This will not delete the groups associated with it.
- Click the person Profile icon to specify the Groups to be included in the Grouping (next step). It is worth noting that adding groups to a grouping is analogous to adding users to a group. If you can do one, you can do the other.
- To manage groups within a grouping, click the Profile icon for that grouping. Click a group listed under Potential members, then click < Add to move the group to the Existing members of the grouping.
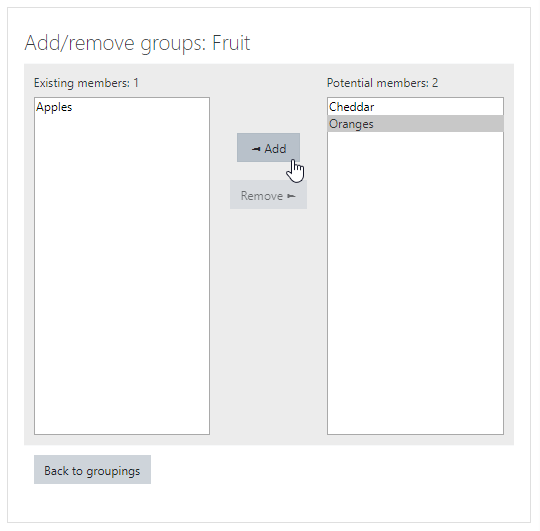
Click
To remove a group from a grouping, click a group listed in Existing members, then click the Remove > to move the group out of the grouping. button. - When you have added all the groupscompleted managing groups in your grouping, click the Back to groupings button.
Where groups can be selected for activities or messagingresources, a grouping can also be selected to include all those in the groups that belong to itlimit the set of groups for that particular activity or resource, since in many courses a student is a member of more than one group.
| Anchor | ||||
|---|---|---|---|---|
|
Overview
...
of Groups/Groupings
This is useful Click the Overview tab on the Groups page to see all your groupings and groups with their members, as well as participants who are not in a group. From the main Groups page, in the Enrolled users dropdown menu, click Overview:

The resulting page will present you with a very useful summary of:
- Group memberships
- Grouping memberships
- A list users not in a group
- Groups not in a grouping
From this page you can also download your group/grouping memberships to .xlsx or .csv.
Using Groups with Gradebook, Attendance, Quickmail, & Course Activities
Gradebook using Groups
| Widget Connector | ||
|---|---|---|
|
Attendance using Groups
| Widget Connector | ||
|---|---|---|
|
Quickmail using Groups
| Widget Connector | ||
|---|---|---|
|
Course Activities using Groups
| Widget Connector | ||
|---|---|---|
|
Related Articles
| Content by Label | ||||||||||||
|---|---|---|---|---|---|---|---|---|---|---|---|---|
|
...