The Sharing Cart is a block inside AsULearn for duplicating course items (activities and resources) and then moving them between multiple courses on the same AsULearn site. instance. With only a few clicks, the Sharing Cart copies and moves a single course item or entire sections from one course, through the cart, and into another.
| Info |
|---|
NOTE: The sharing cart will NOT move resources between different AsULearn |
...
| ||||
|
Step-by-step guide
To add a block complete the following steps:
Add the Sharing Cart block to each of the courses that you want to share items with.
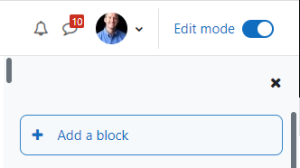
- From the course page, enable the Edit mode toggle at the top right.
- Open the block drawer on the right
- Click Turn editing on in the Gear Menu in the top right-hand corner of the screen.

- Open the drawer the left-hand side of the screen and scroll down to add .
- Click +Add a block.

- Scroll down in In the Add a block menu, scroll down and select Sharing cartCart.
- You will now see the sharing cart as a block The Sharing Cart block is displayed in your course on the right-hand side of your the screen , but only when you are in editing mode.
This block is available only available to users in with a teacher role and only visible when editing is turned on.
A sharing cart will allow an instructor to copy resources and activities from one course to another using the new option to Copy to Sharing Cart which will be an option in the editing menu.

And the "Copy to course"option in Sharing Cart, which will allow the instructor to move resources from the Sharing Cart to the course.

Video on the sharing cart.
- Teacher role. The following image shows items added to the Sharing Cart, which is empty when you first add it to your course.

To copy an item from one course to another
- From the main course page with the item you want to copy, enable the Edit mode toggle at the top right.
- Click the basket icon (highlighted in the image below) for a resource or activity, then click to Confirm.

- Open the course you want to copy the item into and enable the Edit mode toggle at the top right.
- If the Sharing Cart block is not already added to this course follow the steps in the first section.
- Beside each item in the Sharing Cart are icons to Move into folder (right arrow; see below), Move up or down in the list, Delete item from Sharing Cart, and Copy to course (see below):
- Click on the Copy to course icon for the item you want to copy into the open course.
- At the top of the first Topic section is displayed: Copy this shared item: (selected item name) Ø
- Click the Ø to cancel copying the item into the course.
- At the bottom of each Topic section is a circled arrow icon. Click the arrow in the section where you want to copy the item into. Use the Move icon (to the left of each item) to drag it within the section.

- When you are finished, change the Edit mode toggle at the top right.
- . The Sharing Cart block will not be visible.
Anchor folders folders
To organize Sharing Cart items into folders
- From the course page, enable the Edit mode toggle at the top right.
- If the Sharing Cart block has been added to the course, it will be displayed. If items have been added to the Sharing Cart they will be displayed with icons to the right of each.
- To move an item into a folder (which can be collapsed to hide the items in the folder), click the Move into folder icon (right arrow) by the item.
- When there are no folders yet, the Edit field will open: type the name for the folder and press the Enter key. The folder will be created, the item moved into it, and the folder will be collapsed (so you can't see the item). Click on the folder name to expand it; click it again to collapse it.

- To move another item into the folder, click the Move into folder icon by the item, then click the dropdown arrow in the field that is displayed and click on an existing folder.

- To move an item out of a folder, click the Move into folder icon, then click the dropdown arrow in the field that is displayed and click on the top level: / with no folder name.
- When the only item in a folder is moved out of it, the folder is deleted.
- To create a new folder after the first one, click the Move into folder icon, then click the pencil icon beside the field that is displayed. Enter the name into the Edit field and press Enter.
- To cancel moving an item into or out of a folder, click the Ø beside the field that is displayed.
- Folders are displayed in alphabetical order regardless of the order they were created.
- Items can be moved up or down only within their folder or among other items that are not in a folder.
- To hide all items listed in the Sharing Cart click the gear icon (top right of block) then click Hide Sharing Cart block. The block will collapse to show only the name. Click Show Sharing Cart block from the same gear menu to display all items again. The Sharing Cart block is always hidden completely when Editing is turned off.
- When there are no folders yet, the Edit field will open: type the name for the folder and press the Enter key. The folder will be created, the item moved into it, and the folder will be collapsed (so you can't see the item). Click on the folder name to expand it; click it again to collapse it.
*The sharing cart will also enable to the copying of entire sections in the course. Use the Copy section button to copy a selected section into your cart and use the same steps above to copy the section into the course.
| Anchor | ||||
|---|---|---|---|---|
| ||||
| Widget Connector | ||||
|
Related Articles
| Content by Label | ||||||||||||
|---|---|---|---|---|---|---|---|---|---|---|---|---|
|
Search Knowledge Base
Submit a Service Request
We value your feedback! Click HERE to suggest updates to an existing article, request a new article, or submit an idea.
| Page properties | ||
|---|---|---|
| ||
|
...