Lightboard rooms provide a convenient way to make recordings. The Lightboard is a glass chalkboard combined with a video camera setup that allows instructors to create educational content. Writing on the board's transparent surface, instructors face the audience, and lecturing with hand-drawn or imported visuals. Facing the camera while lecturing creates a more natural and engaging recording.
Getting Started
Step 1: Make reservation and get the room code
There are 4 locations on campus for light boards
Leon Levine Health Sciences (LLHS 459) Lightboard Calendar Link
Ann Belk Hall - to reserve contact Darrell Laws lawsbd@appstate.edu
Peacock Hall
Belk Library and Information Commons https://library.appstate.edu/services-search/video-recording-room
It’s a good idea to post a “Room in Use” tag on the outside door while you will be using the room.
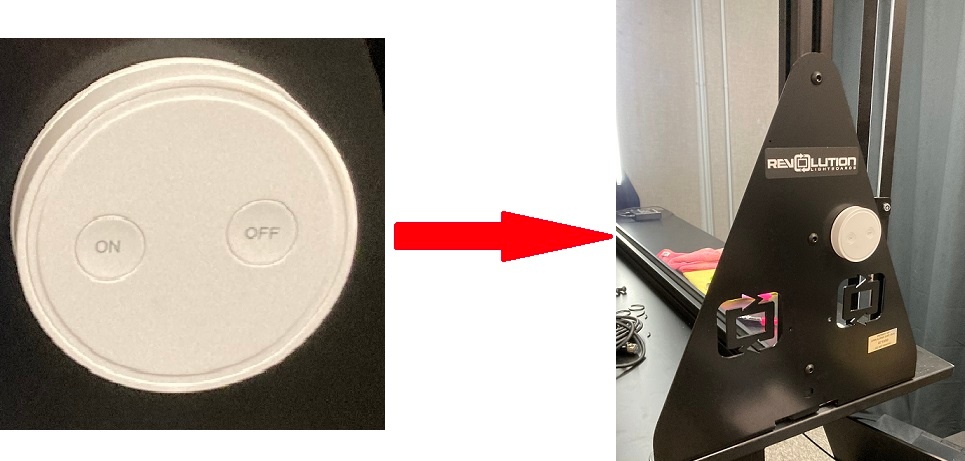
Step 2: Power Up the Lightboard
Look for the big white button. It will be in different locations in different rooms.
Click the On button.
 Step 3: Adjust the Lightboard height and camera zoom
You will need to adjust the height of the lightboard to make it comfortable for you to write on. The top of the board should be just at the top of your reach. Most people have a hard time writing much below their shoulder level. The controls for the board height are on the right side of the board.

Step 3: Pick what colors to wear for the video
Darker clothing works best so your writing is readable in front of your clothing. Deep blue or purple are really nice. Avoid Black. No text or logos on clothing.
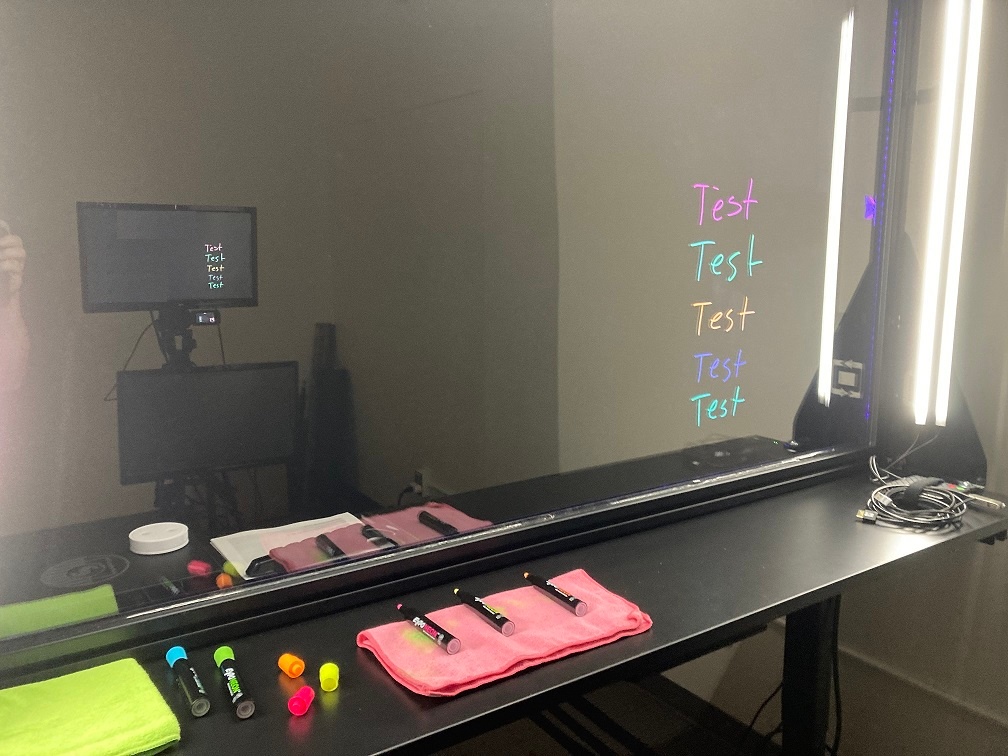
Step 4: Adjust the lighting
Turn the room lights off during set up and filming. The lightboard itself has 3 sets of lights. The first are ultraviolet lights around the edge of the glass. These are the ones that make the markers glow. The second set covers the front zone. That is the area closest to the glass. These will be the lights that illuminate you as the presenter. The final set is the back zone. They primarily light the space behind you and give depth to your image. The setting of the front and back zones are to personal taste and are affected by things like the colors you are wearing and your skin tone. Do a short test video to make sure you like how it looks.

Step 5: Set up your workspace
You need to make sure things that you will need during the video are easily at hand but are below the camera frame. Things like the color markers you need, a towel to erase during the video, and any props you made need. Make sure they do not show up in the video as they can be distracting. Select what colors you want to use during the video and make sure you clean the glass well.
Recording Your Presentation to a thumbdrive
Insert your thumbdrive to the blackbox on the podium, press the red button to begin recording, and press the red button again to stop. When you are all done recording, you can eject the thumb drive and take the video file (MP4) with you.

You will need to provide your own thumbdrive and ensure that it can hold the large video files that you will be creating.
Lightboard Tips
- When writing on the board, look at what you are writing. When talking about something on the board, point at it and look at it.
- When you aren't writing or pointing, look at the camera.
- Leave yourself a window - a blank space on the screen. Or at least try not to draw horizontal lines through your eyes or mouth.
- When pointing, try to point from the side, not from the back, so that your fingers stand out against the black background.
- Dry-erase and wet-erase markers squeak. To reduce squeak, use fresh markers and don't push so hard against the glass. With a light touch, you can mostly avoid squeaks. Taping on the glass will also be heard on the video.
- Plan your talk so you know where you are going to be drawing on the lightboard. If you need to erase frequently or add another board, it's probably too long.
- Pause before starting, and look at the camera. This gives you a clean cut point to edit out your walk-on.
- Expectations for videos are higher than for classroom lectures, but you needn't strive for perfection.
- Leave room at the bottom of the screen for closed captions.
- Do a practice run before recording a long piece.
Adding Powerpoint or Google slides to your presentation
How to make slides for the Light board
Sample Slides
https://docs.google.com/presentation/d/1YpTsNLrbC3yWU2eKkx_d72F4K4-mtt_weNGNnvqCUHo/edit?usp=sharing