This article provides simple step by step instructions on creating a knowledge base article for the Appalachian Technology Knowledge Base - ATKB, using approved templates.
Self Help Only
Knowledge Base Articles are for helping users solve their own problem. If the answer is to put in a support request then there is no need for an article on the subject.
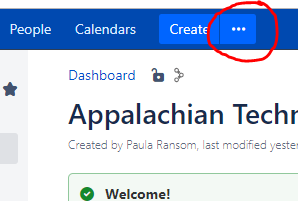
- Navigate to the ATKB Space by clicking on Spaces at the top of the page. If Appalachian Technology Knowledge Base is not listed, click on Space directory to see a list of all available spaces .
- Click on the "Create from template" button
- Choose one of the approved templates (How-to or Troubleshooting)
Click Next
- Enter the title of the article into the Name text box
- How-to Article titles should be the part of the sentence following "How to".
Example: How to create a knowledge base article for ATKB = Create a Knowledge Base Article for ATKB - Troubleshooting Article titles should be a simple description of the problem.
Example: Missing Classes in AsULearn
- How-to Article titles should be the part of the sentence following "How to".
- Enter label(s) for the article in the Label text box.
Labels for the Article should include the service or software it falls under. Labels are lower case and one word only. If two words are needed, use a dash in between the words (Example: asulearn, digital-measures, google-group). Hit enter after typing each label for it to be added. Click the X next to a label to remove it.
These labels are used to organize articles only (list related articles together and in the Page Tree). Searches in Confluence and Jira Service Desk include the title and body of all articles so extensive labeling is not necessary. - Click Create (Title and labels can be edited after creation)
Fill out Template
To Be Avoided
Avoid the use of First-Person (I, We, Me, My, Ours, etc) and Second-Person Pronouns (You, Your, Yours) when creating an article for the Knowledge Base.
The cell on the left is the body of the article.
Click on Instructional text to replace with the text of the article. Instructional text does not show up on the published article. Elements are movable and can be deleted if not needed. Use the format toolbar at the top of the page to add elements and format the body of article. Click Preview at the bottom of the page to see what will be published. From Preview mode click Edit to get back to Edit Mode.
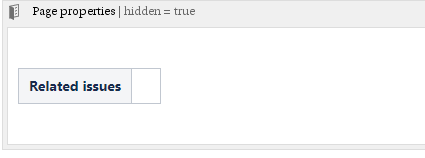
Please leave the Page Properties box at the bottom of the article. This is hidden and used for reporting purposes, it will not show up anywhere but edit mode.
- The cell on the right is for Links and Pertinent information. Please do not do not remove or change the order of the current elements. New elements can be added to the bottom of the section if needed.
HOME is a link to the knowledge base Dashboad - Editing is not required.
- Related Articles is the Content by Label Macro that will list articles that have the same label(s) as your article - Editing is not required unless labels change
- Next is a good location to add links to additional information - Use the link button at top of page to add a link to a URL, Confluence Page, File, Anchor, etc
- The Link to the customer service portal of the Appalachian Technology Service Desk will be added once ATSD is moved to production - Editing is not required

Click Save
At this time permission must be granted to create an article for the Knowledge base. Request permission by emailing Paula Ransom - ransompa@appstate.edu
HOME
Related Articles
There is no content with the specified labels
Confluence Documentation on Article/Page Creation
Click here to submit a Support Request