
Overview
Copilot Studio is a powerful, user-friendly platform designed for creating and deploying AI-driven copilots (also called chatbots or agents) that enhance productivity, streamline workflows, and enable intelligent automation. Copilot Studio equips faculty, staff, and students with the resources to drive innovation and efficiency across campus by developing AI-powered assistants that can
- Support learning, research, and campus operations
- Streamline academic and administrative processes without using code
- Improve student services, enhance research workflows, or support faculty research initiatives
Access
App State Faculty/Staff/Students can access Azure AI Studio as part of our Microsoft Suite. To request a license, enter a Service or Software Request.
Creating a Copilot Agent
Once you have a license, go to copilotstudio.microsoft.com and sign in with your App State credentials.
- Click Create in the left sidebar.
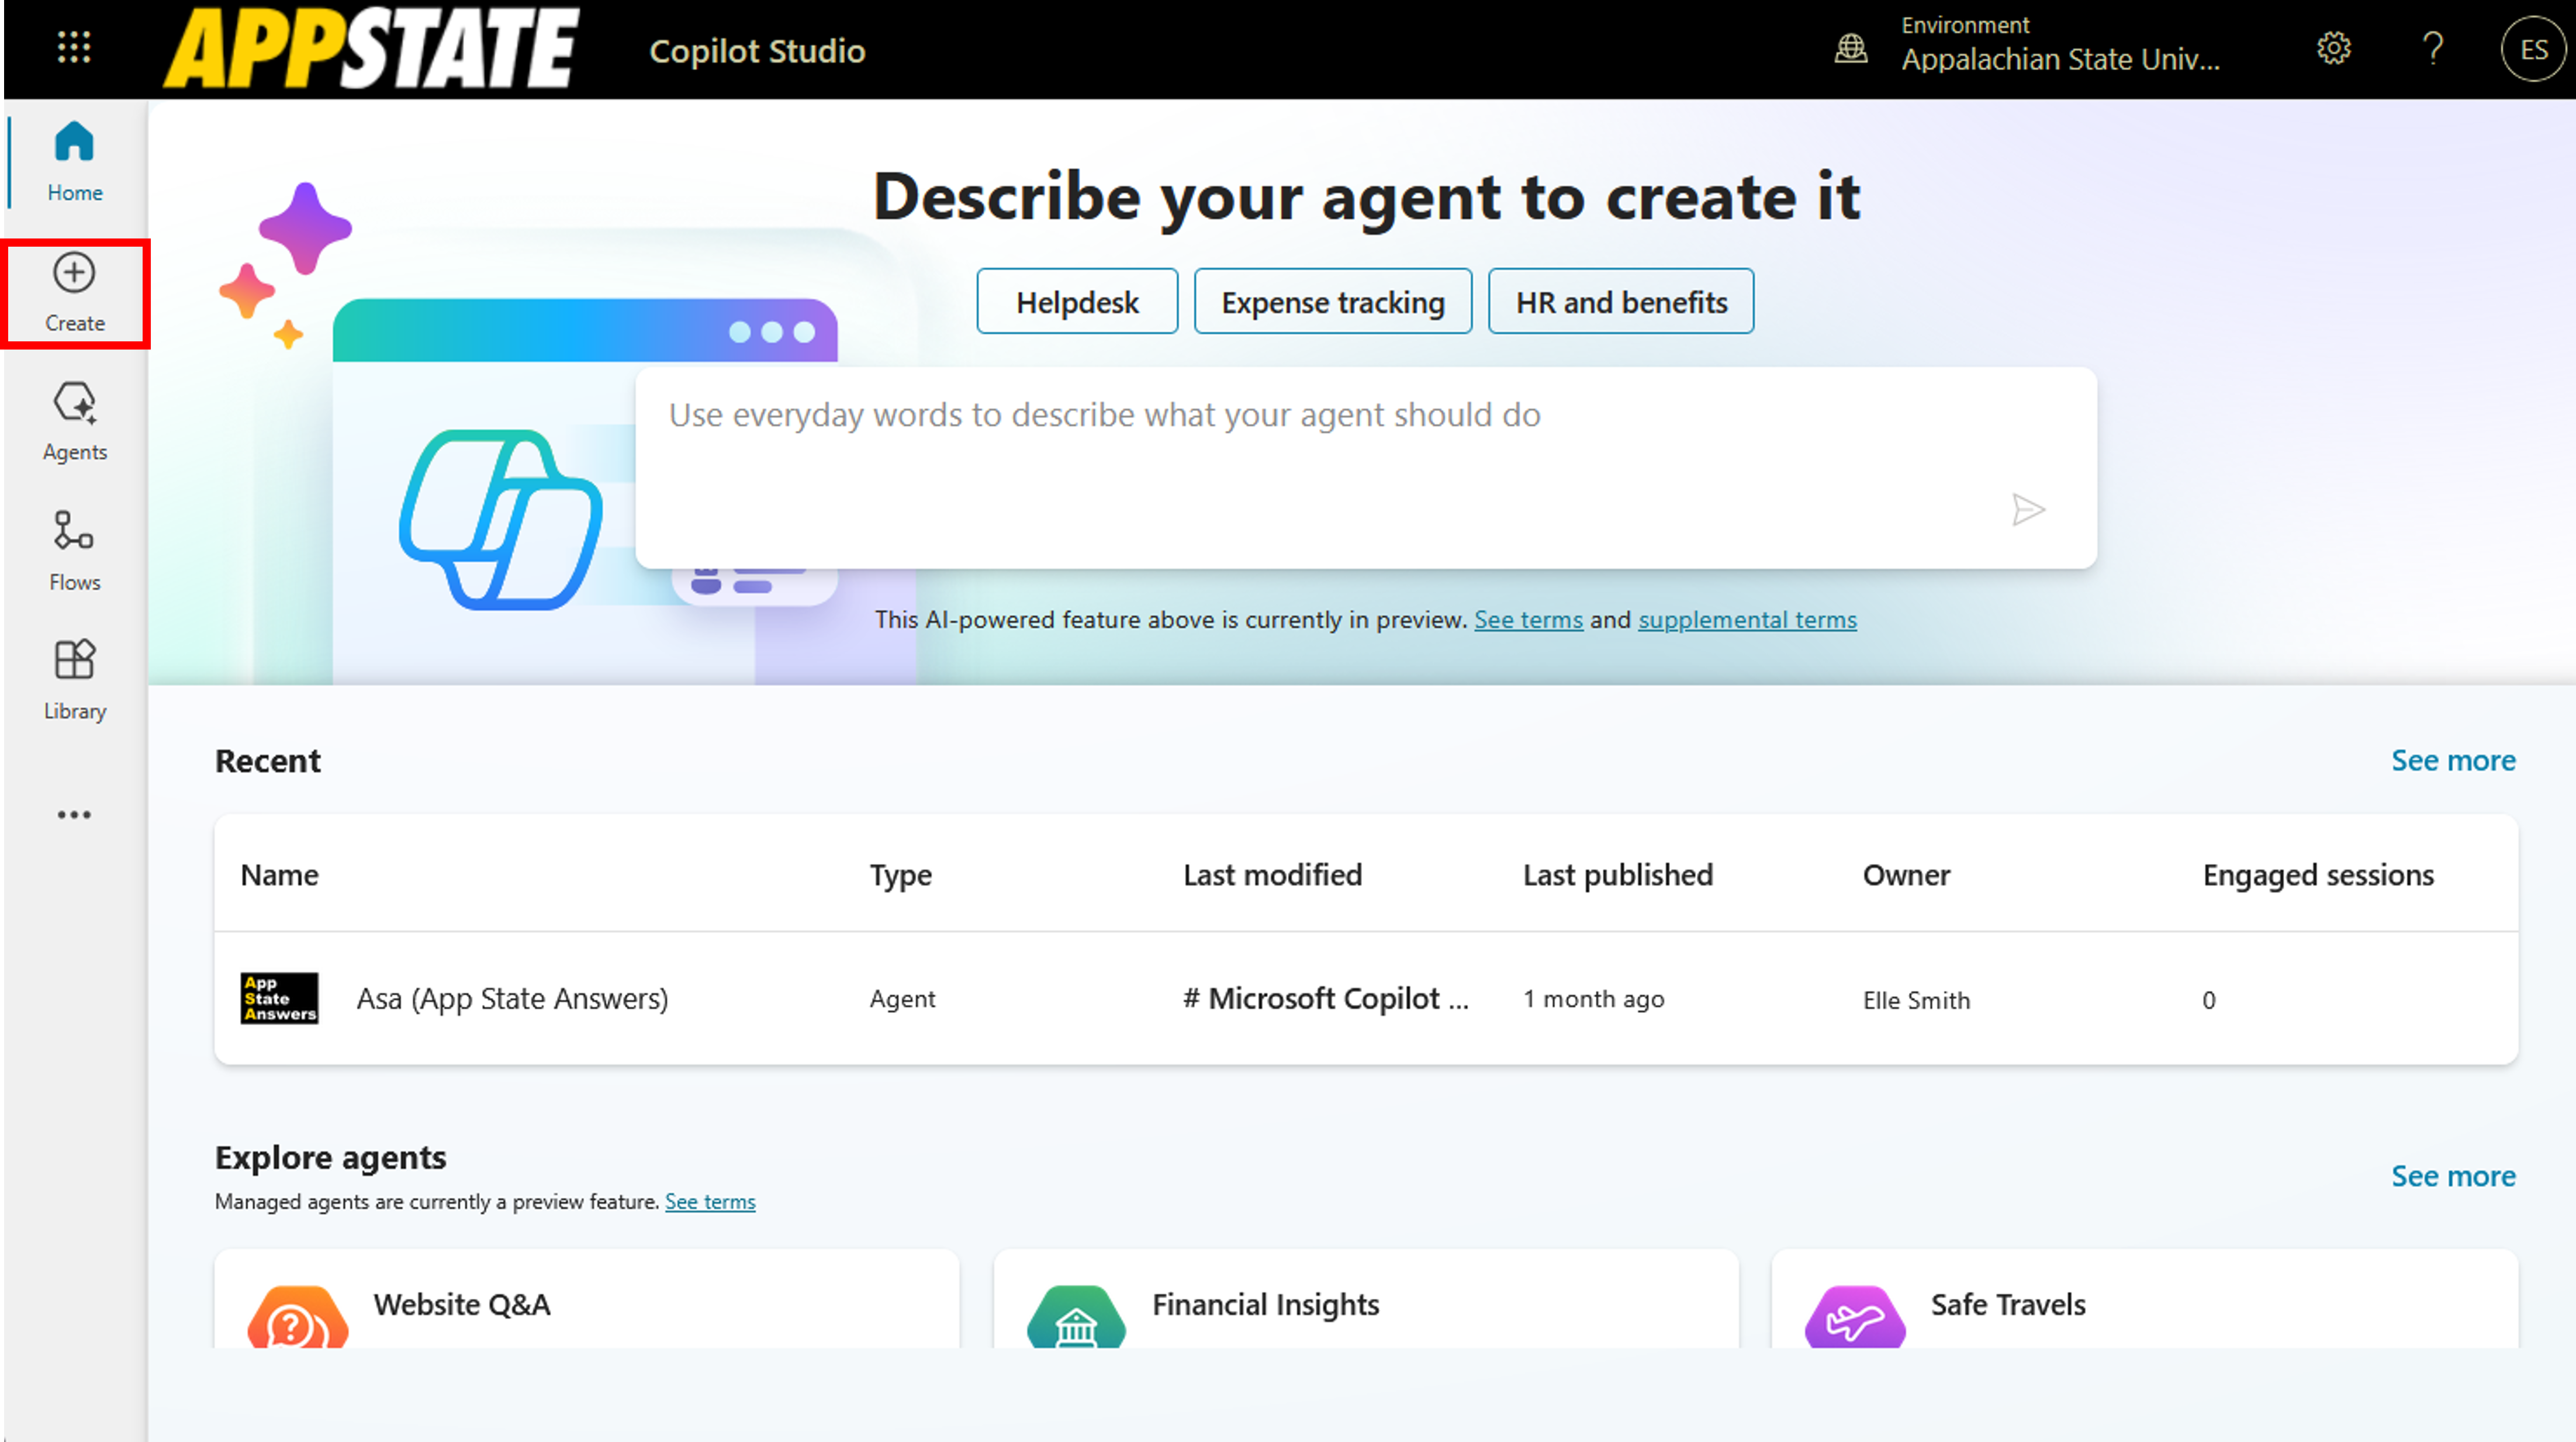
- You can explore agent templates or create your own. Click create a New Agent.

- You will see the agent interface that can help you create an agent using conversational AI, or begin building your own from scratch by clicking Skip to Configure button in the top right.

Under Overview in your agent settings:
- In the Describe tab, click Edit to provide the details of your agent.

- Enter a name for your agent, a short description, and then detailed instructions for your agent.

- Scroll down and click the + to add your knowledge sources. Copilot Studio can scrape data from public websites, or you can provide data points through Sharepoint or upload files directly to your agent.
Only text-based files are supported.
- After adding your knowledge sources, either disable the setting that says Allow the AI to use its own general knowledge or leave it enabled.
- Enabled: This will allow AI to respond using the data it was trained on up to the knowledge cutoff date.
- Disabled: Your agent will only use your knowledge sources to generate content.

5. Scroll back to the top to Save. You’re knowledge source status will say Ready.
Topics are essentially conversation themes or intents that are specific subjects or areas of discussion that your agent is programmed to handle.
- Navigate to the Topics section.

- Click Add a topic. You can create it from blank or create it using Copilot (using Copilot allows the AI to take over creation).

- Choosing from blank, where it says untitled, name your topic.

- Now, you can add Trigger Phrases by clicking Edit under your trigger. These are phrases that users might use to bring up this topic.

- Click the plus to add.

- Next, you will create Responses that your agent should provide when this topic is triggered. Click the plus node button.

- Choose a response type.

- This example shows the Send a message response type, and I want to send this response on a trigger phrase.

If you use links in your responses, they must be formatted in Markdown.
- Click Save; then you can test your agent with the trigger phrase.

At any point in this process, after you add a knowledge source, you can test your agent.
- In the testing panel, input text to test your agent.

- Click on any of the inputs or outputs in the chat box to see the conversational path and make any adjustments.

Publishing and Sharing
- Publish your agent at any stage in the process by clicking the Publish button.

- Click Publish to make your agent available across all channels (including the demo channel).
You can share a demo version of your Copilot Agent.
- Click the Channels button in the top menu.

- Click the Demo website button.
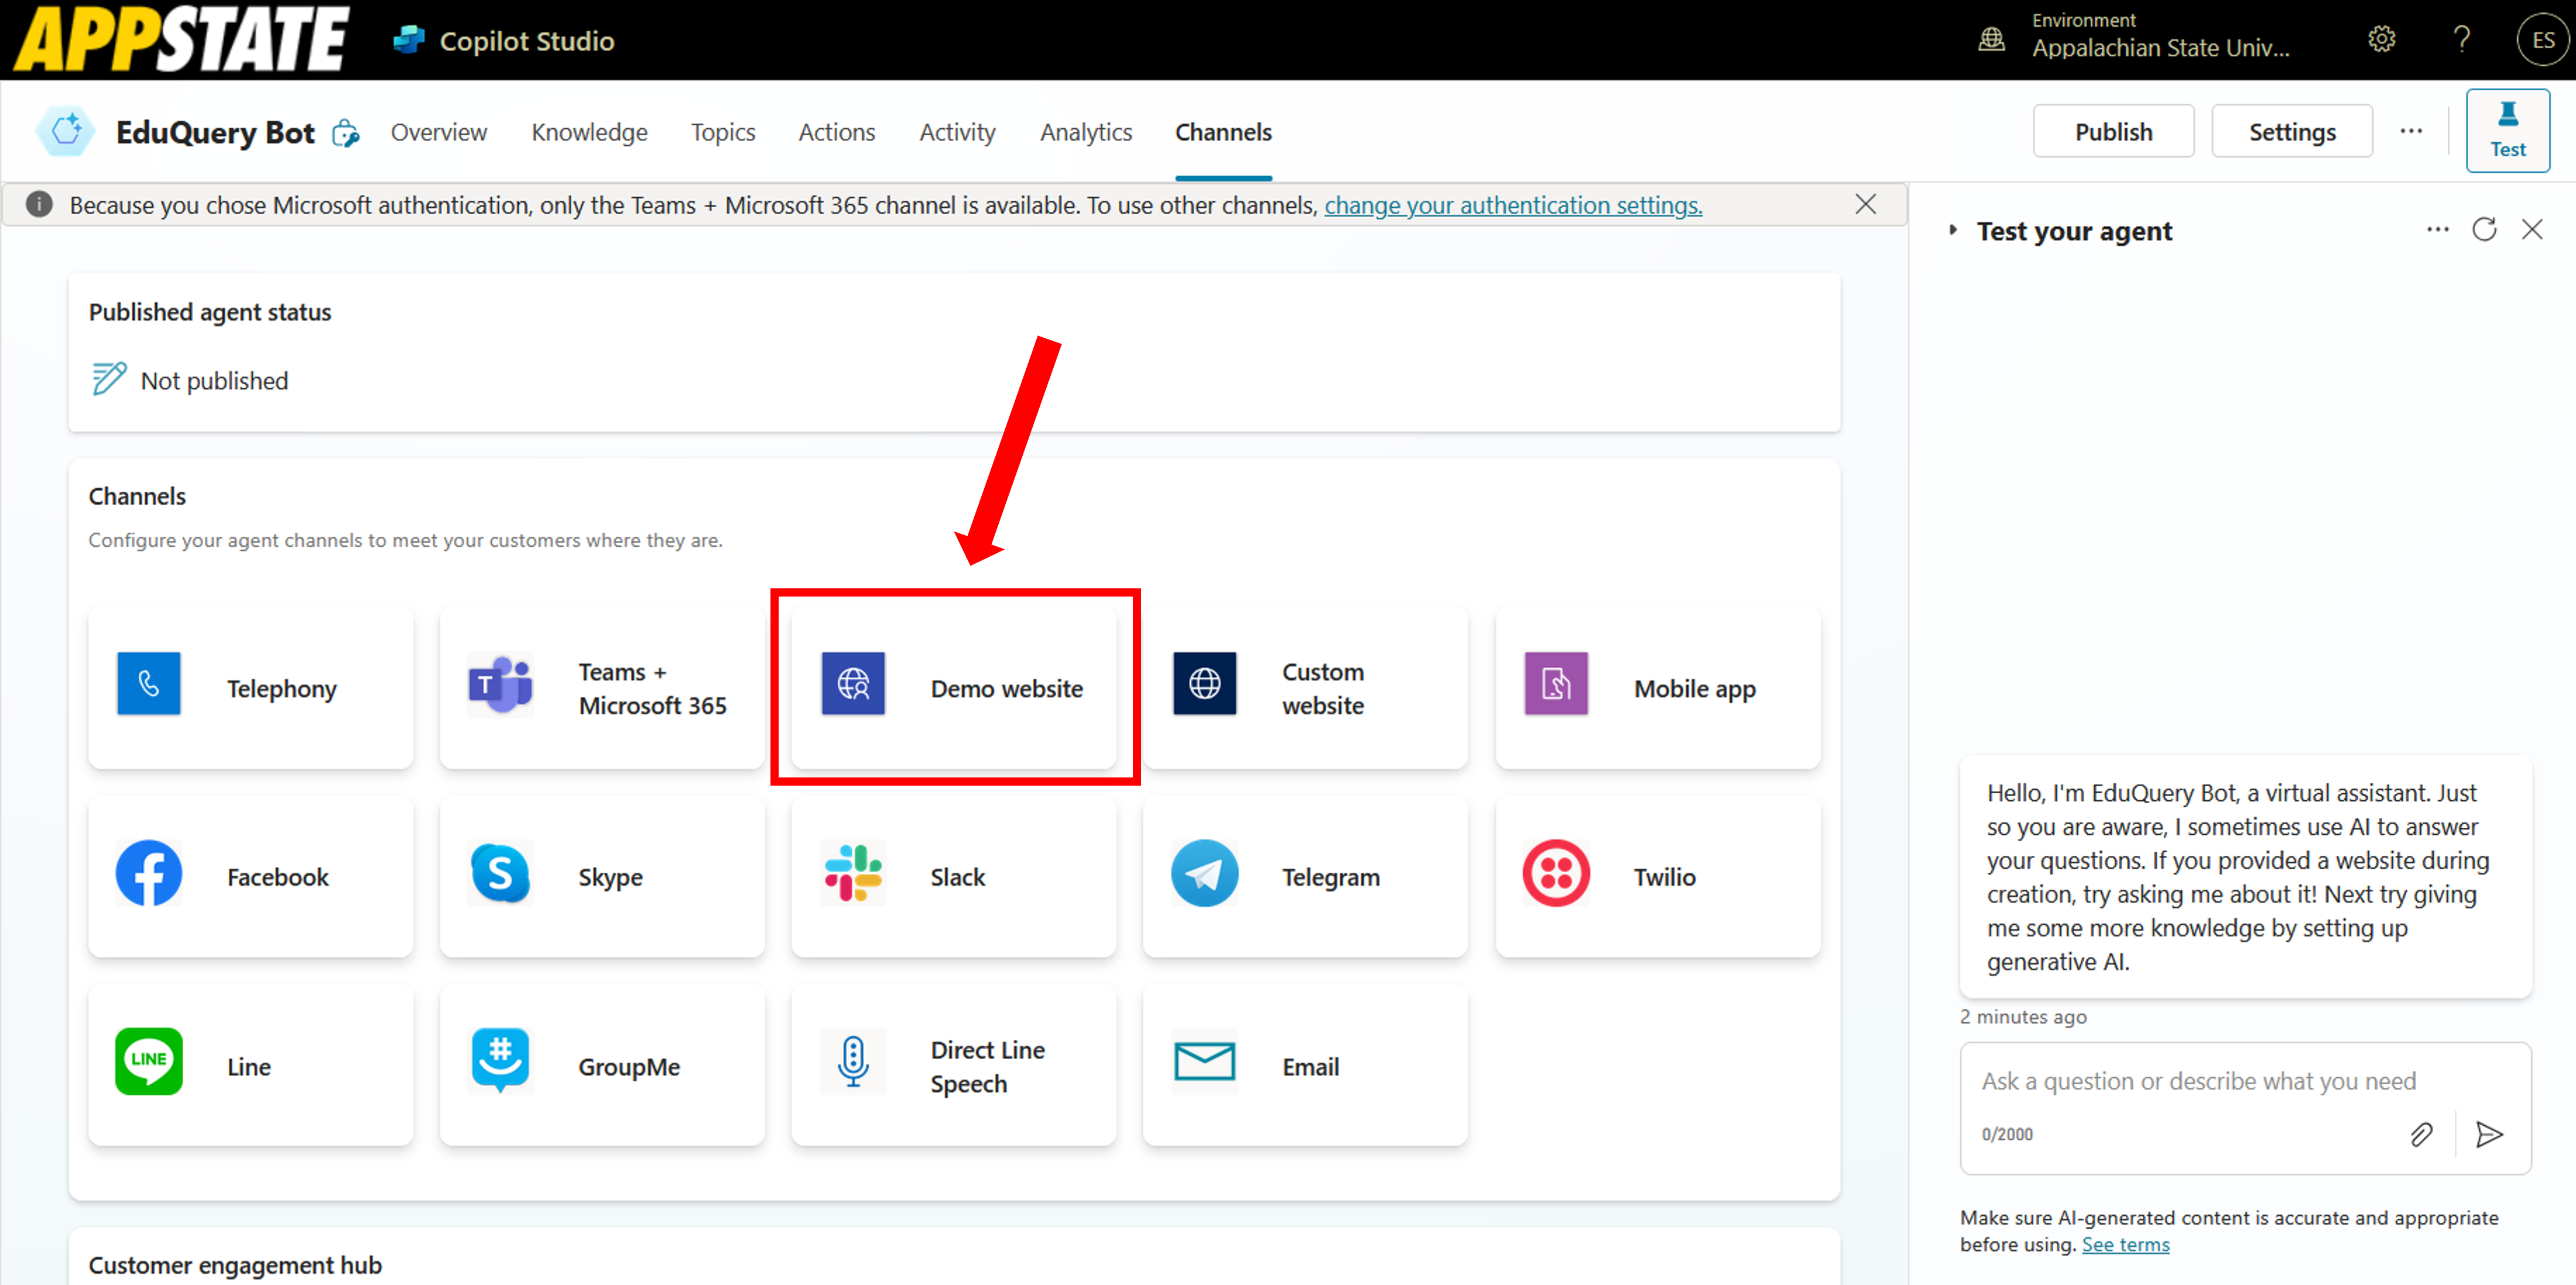
- Enter an optional welcome message and conversation starters to help your users test your agent, and copy the link to your demo before clicking Save.


Resources
- Linkedin Learning: Building in Microsoft Copilot Studio
- Microsoft: Get Started with Microsoft Copilot Studio