GitHub Classroom is a teaching and learning platform that helps educators manage and distribute assignments using GitHub. It distributes, collects, and helps grade coding assignments using GitHub repositories.
Key Features
- Simplified Assignment Creation: Teachers can easily create assignments with starter code, instructions, and due dates.
- Student Collaboration: Facilitates teamwork by allowing students to work together on assignments within private repositories.
- Automated Grading: Supports automated grading through integration with testing frameworks, streamlining the feedback process.
- Version Control: Teaches students valuable version control skills using Git, essential for software development.
- Improved Communication: Provides a central hub for instructors to communicate with students and provide feedback.
Default Settings
- Actions must be enabled to use autograding to run GitHub presets or custom YAML tests. See here for more information on enabling GitHub Actions.
- Personal access tokens are needed if any external access to the assignment repositories is required (i.e. for maintaining a separate repository to use hidden tests for autograding).
- Large file storage may be required for certain disciplines (Art, Photography, Graphic Design).
How to Use GitHub Classroom
- Create your template repository on GitHub by entering a name, description, and then choosing your organization as the owner.

- Add necessary files to the repository: starter code, instructions, rubrics, etc.

- Commit your changes.
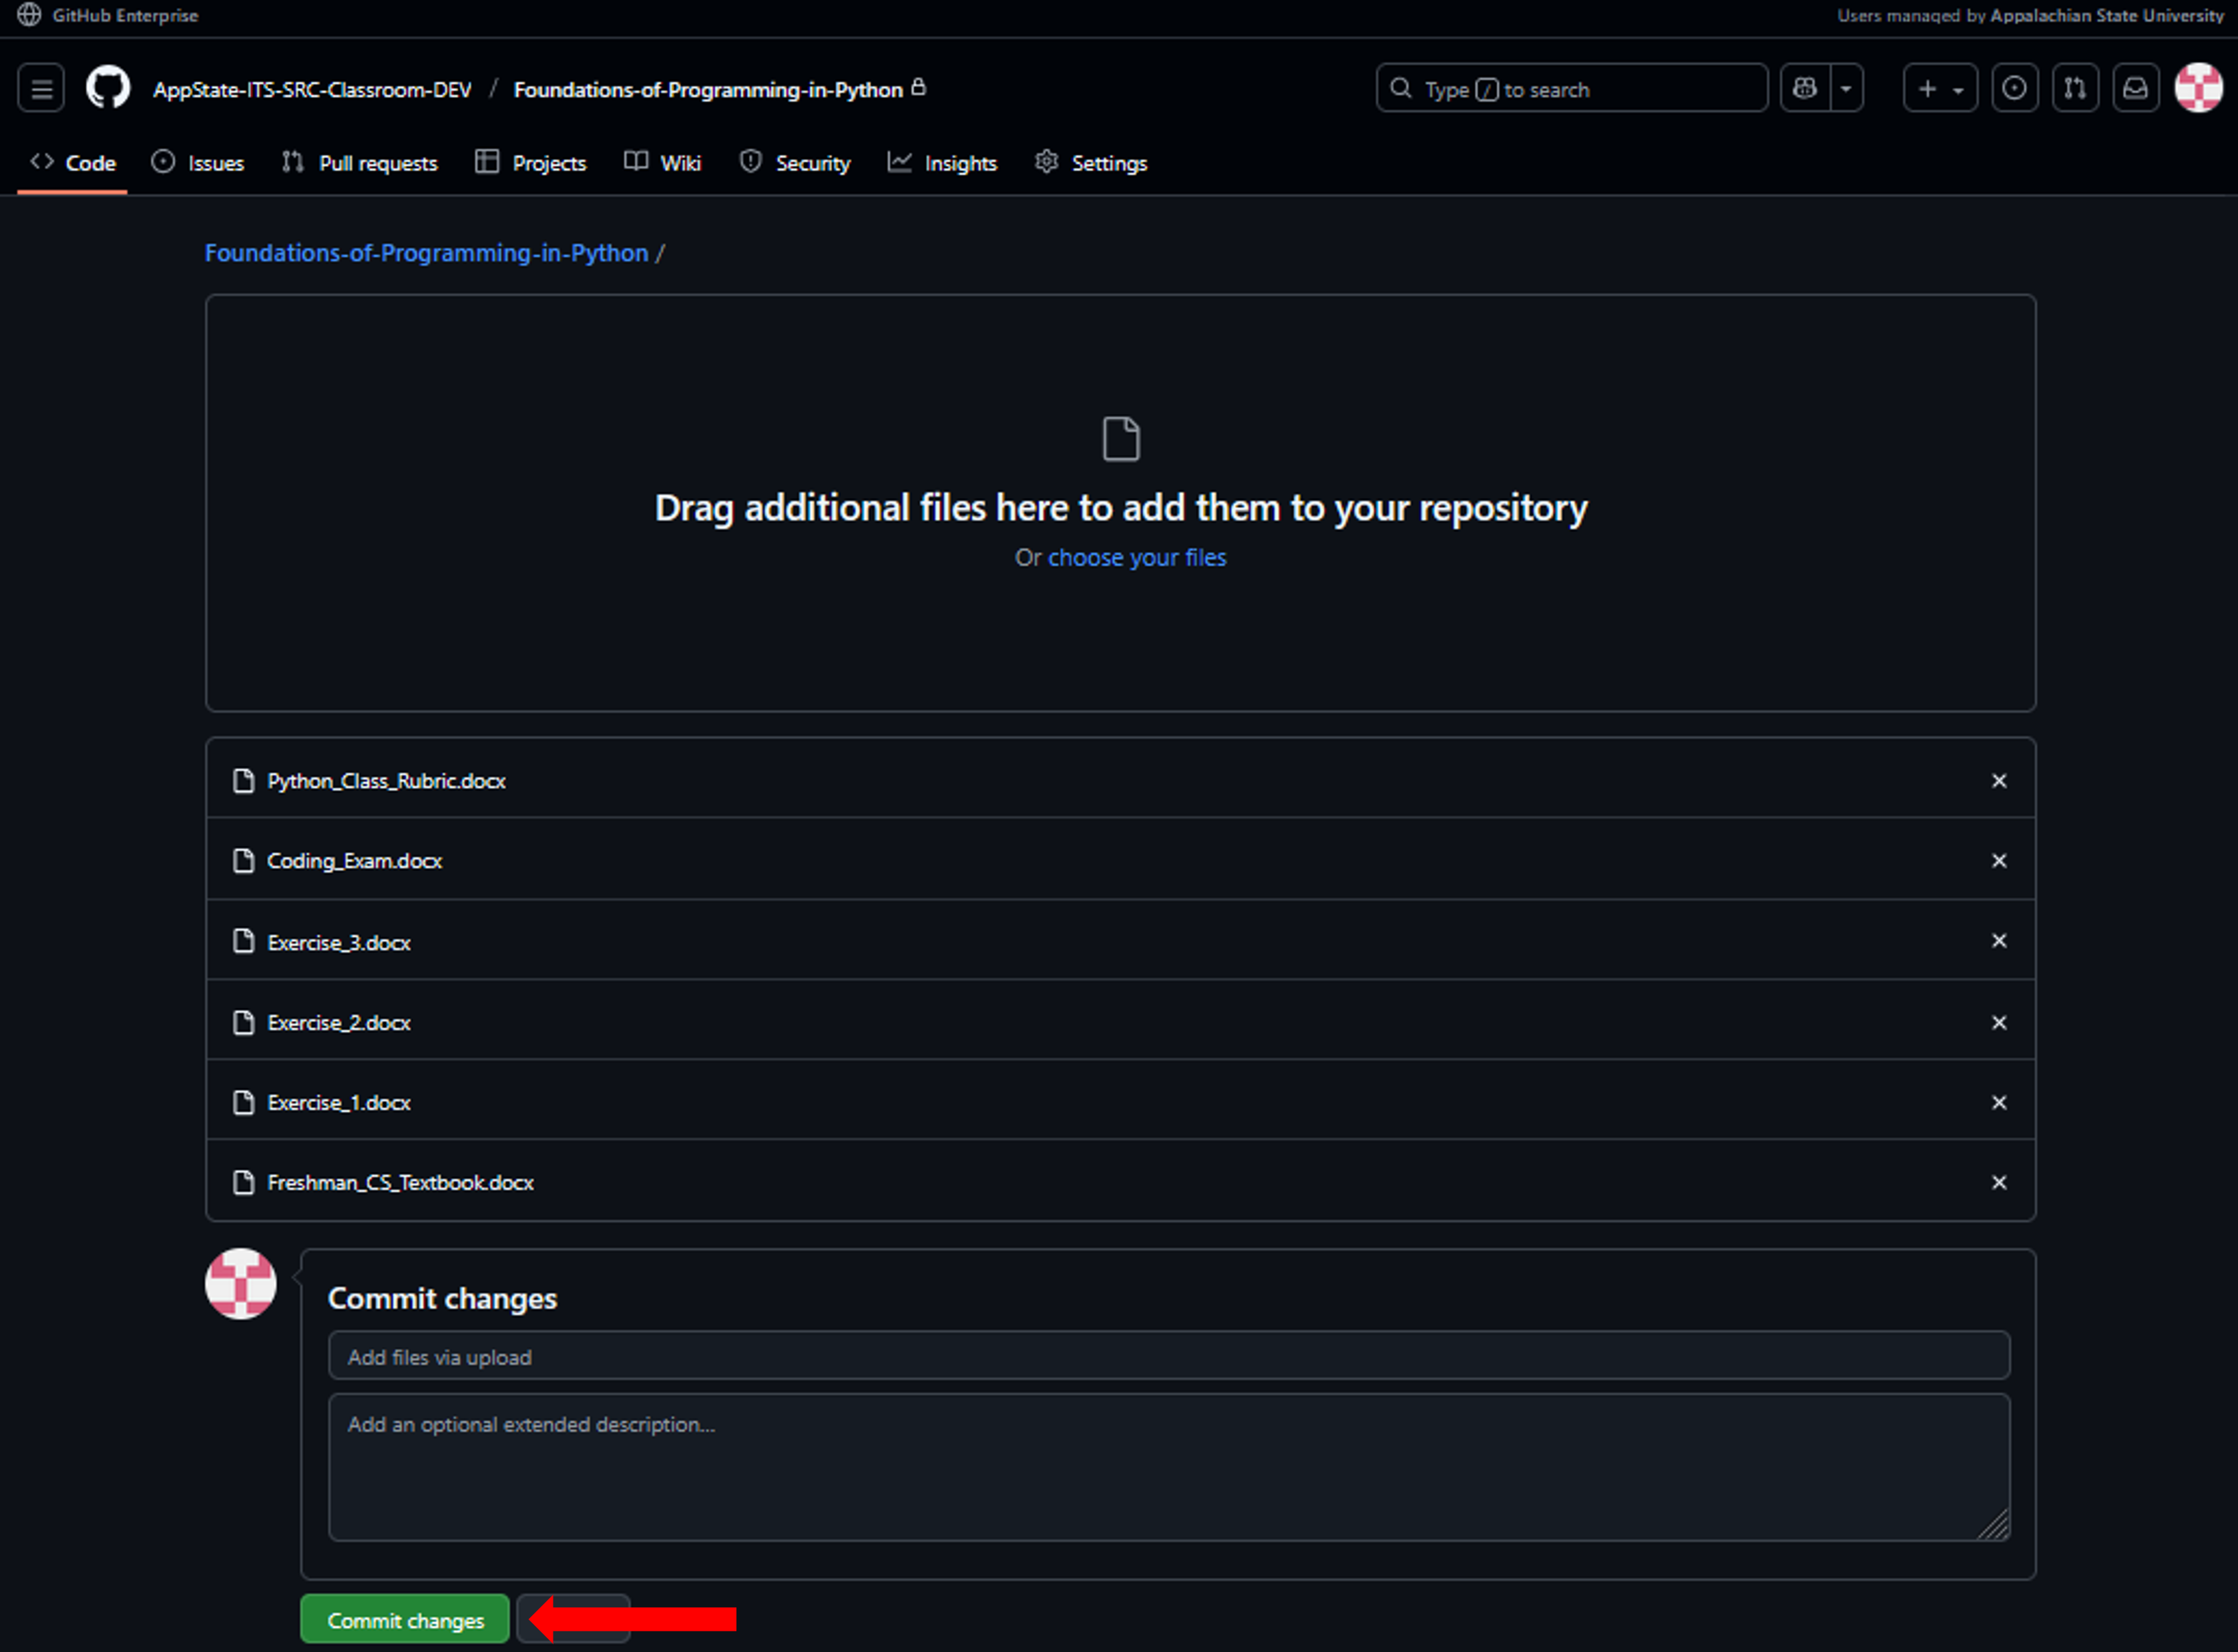
- Open the repository Settings.
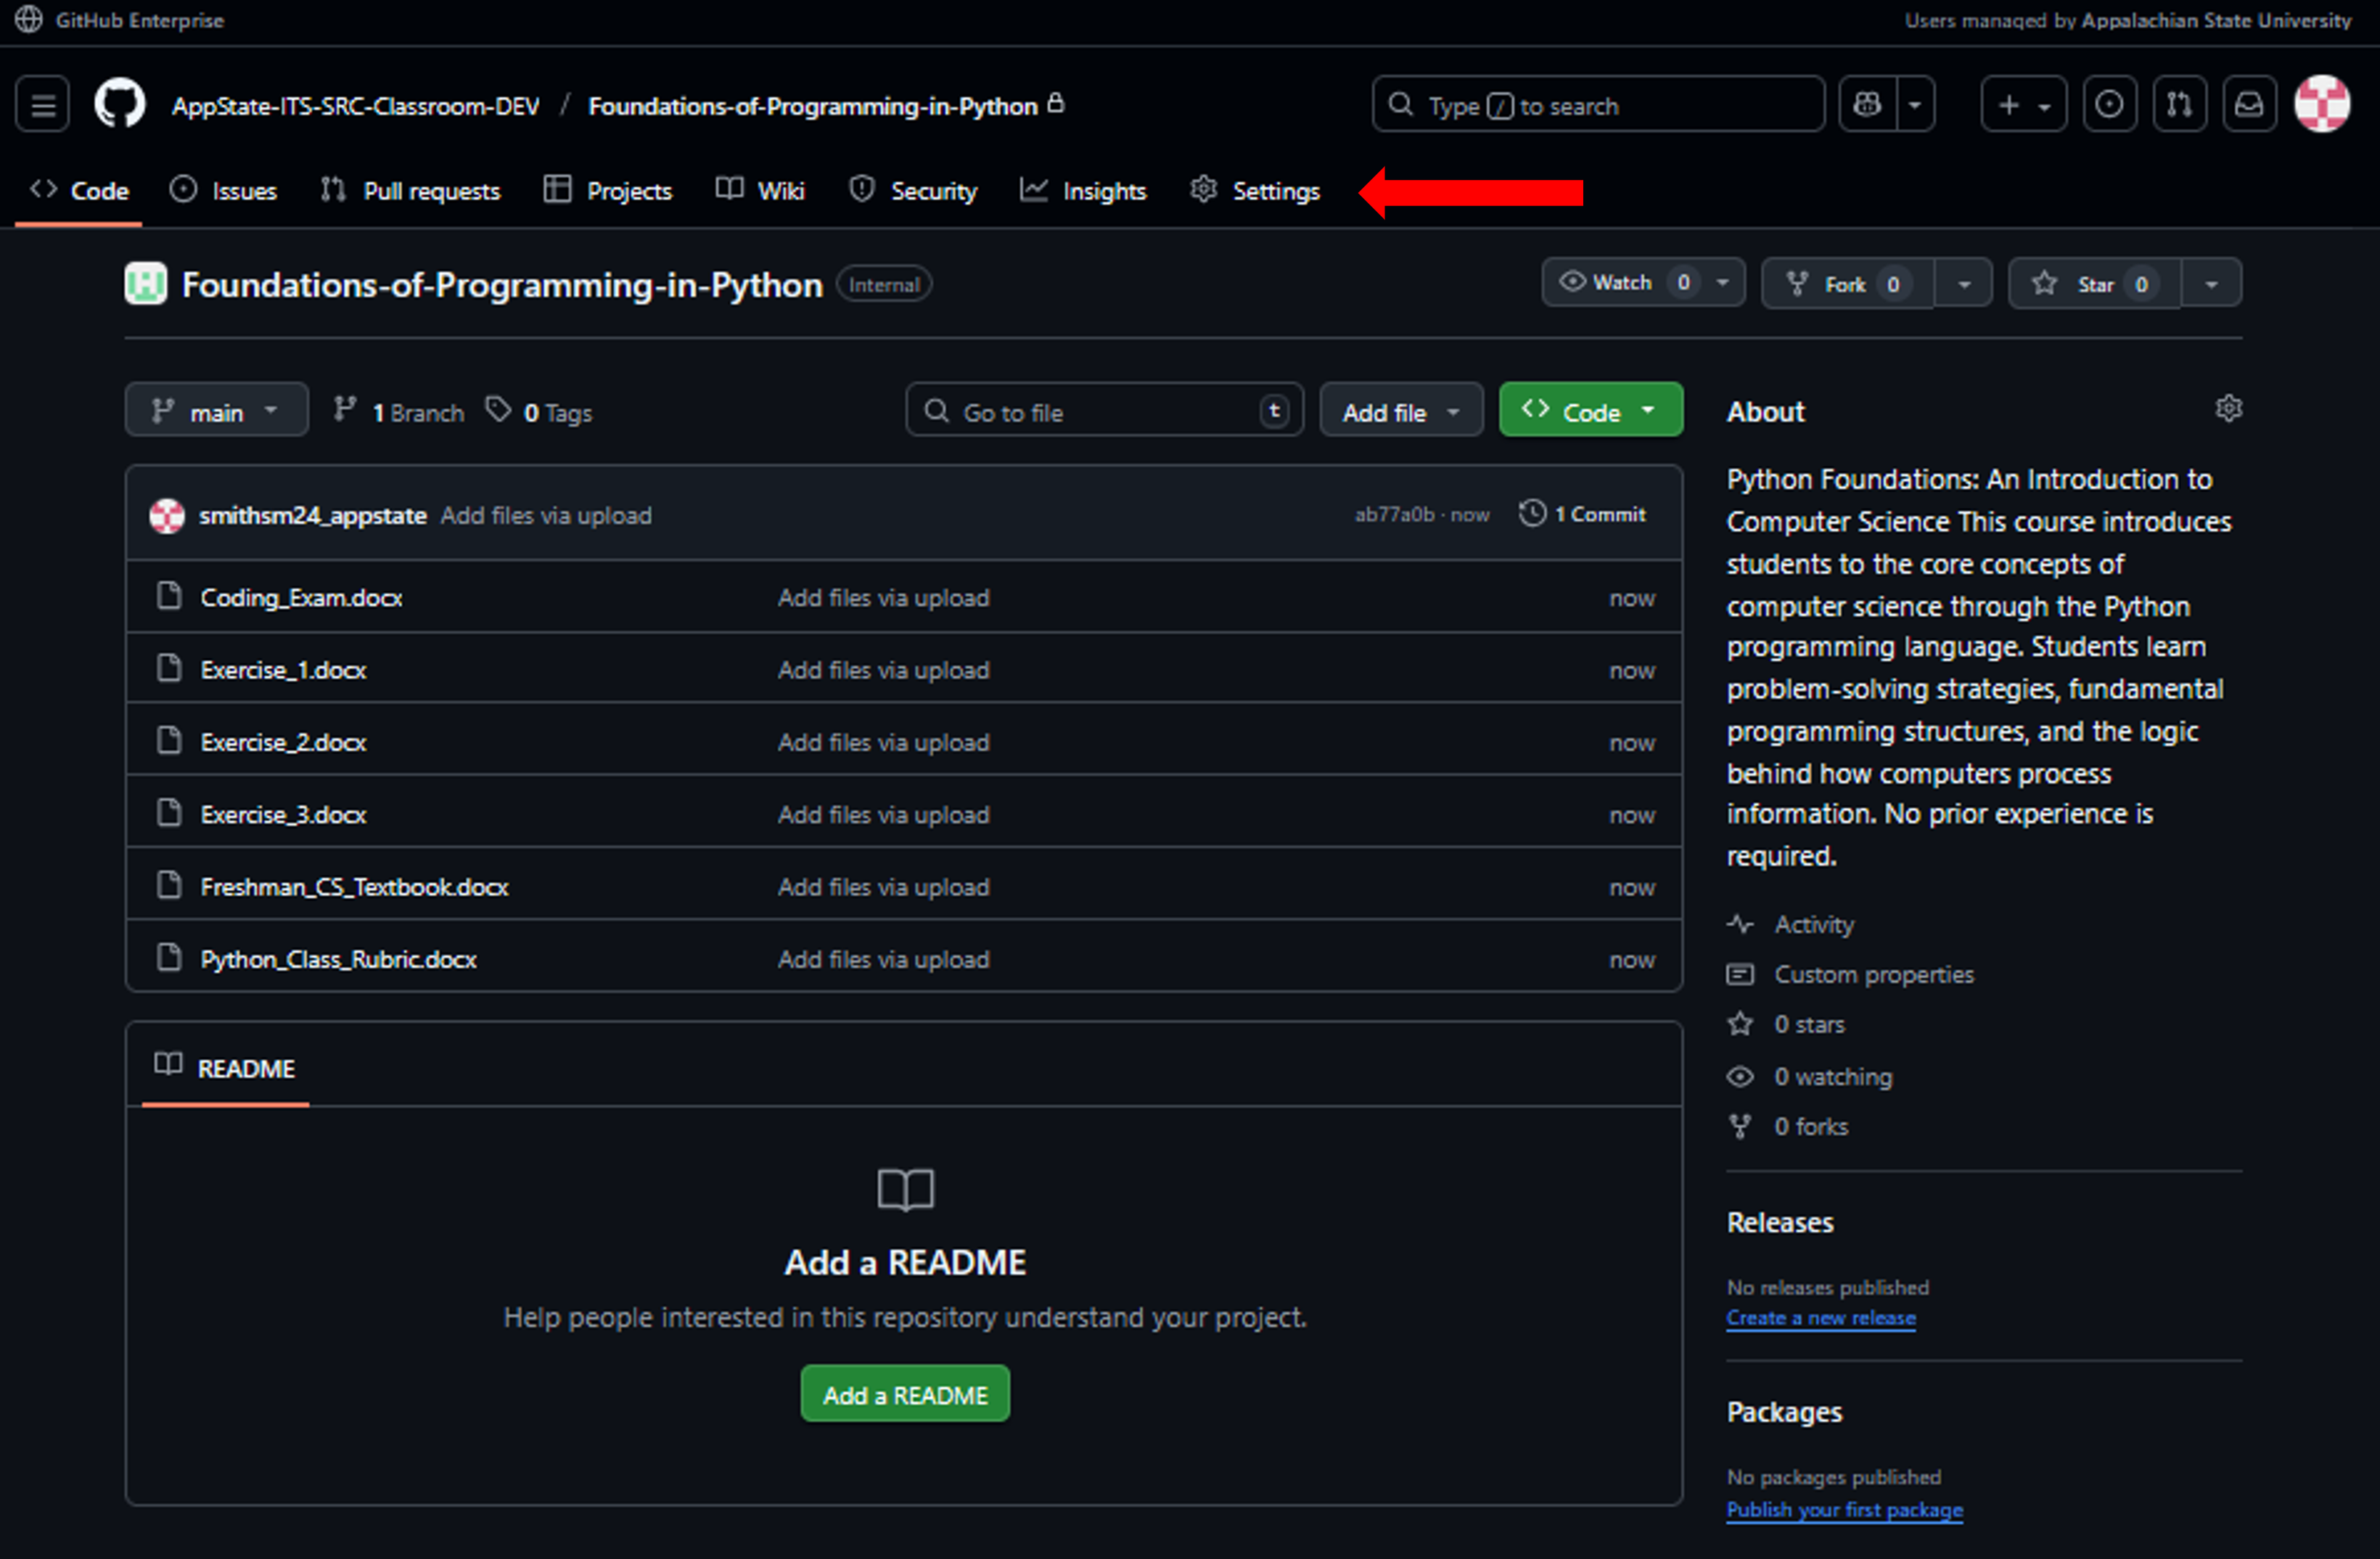
- Check the box to enable your repo as a template repository.

- Go to classroom.github.com, and create your first classroom.

- Select your organization.
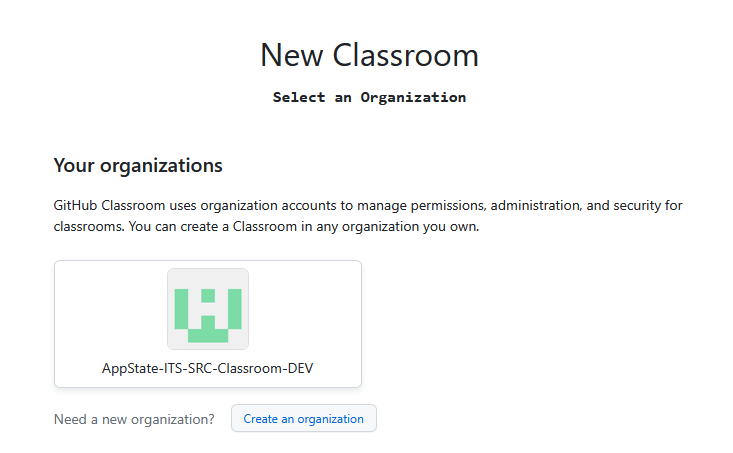
- Enter a name for your classroom (course prefix-course number-section number, Course title.

- Invite collaborators (optional).
You can add students by uploading a CSV, text file, or importing from Canvas. You can also manually create your list. 
- Create an assignment.

- Define Assignment Details.

- Select your template repository by searching for it.

Configure the repository settings by
Choosing privacy settings (private or public).
- Determine student permissions (e.g., admin access).
- Select branches to include in the assignment.
- You can also choose to set up autograding.
- Choose between GitHub presets or create a custom YAML configuration file.
Define autograding triggers (on submission, scheduled, manual).
- Specify protected file paths to prevent students from altering testing files.
- Once the assignment is created, you can copy the invitation URL to send to your students so they can accept the assignment.
Once you've set up your Classroom, invite students by sharing the unique invitation link with them. They must join the organization and the classroom before they can access the assignment.

- The student clicks the invitation link and accepts the assignment.

- GitHub automatically creates a new repository for each student/group.
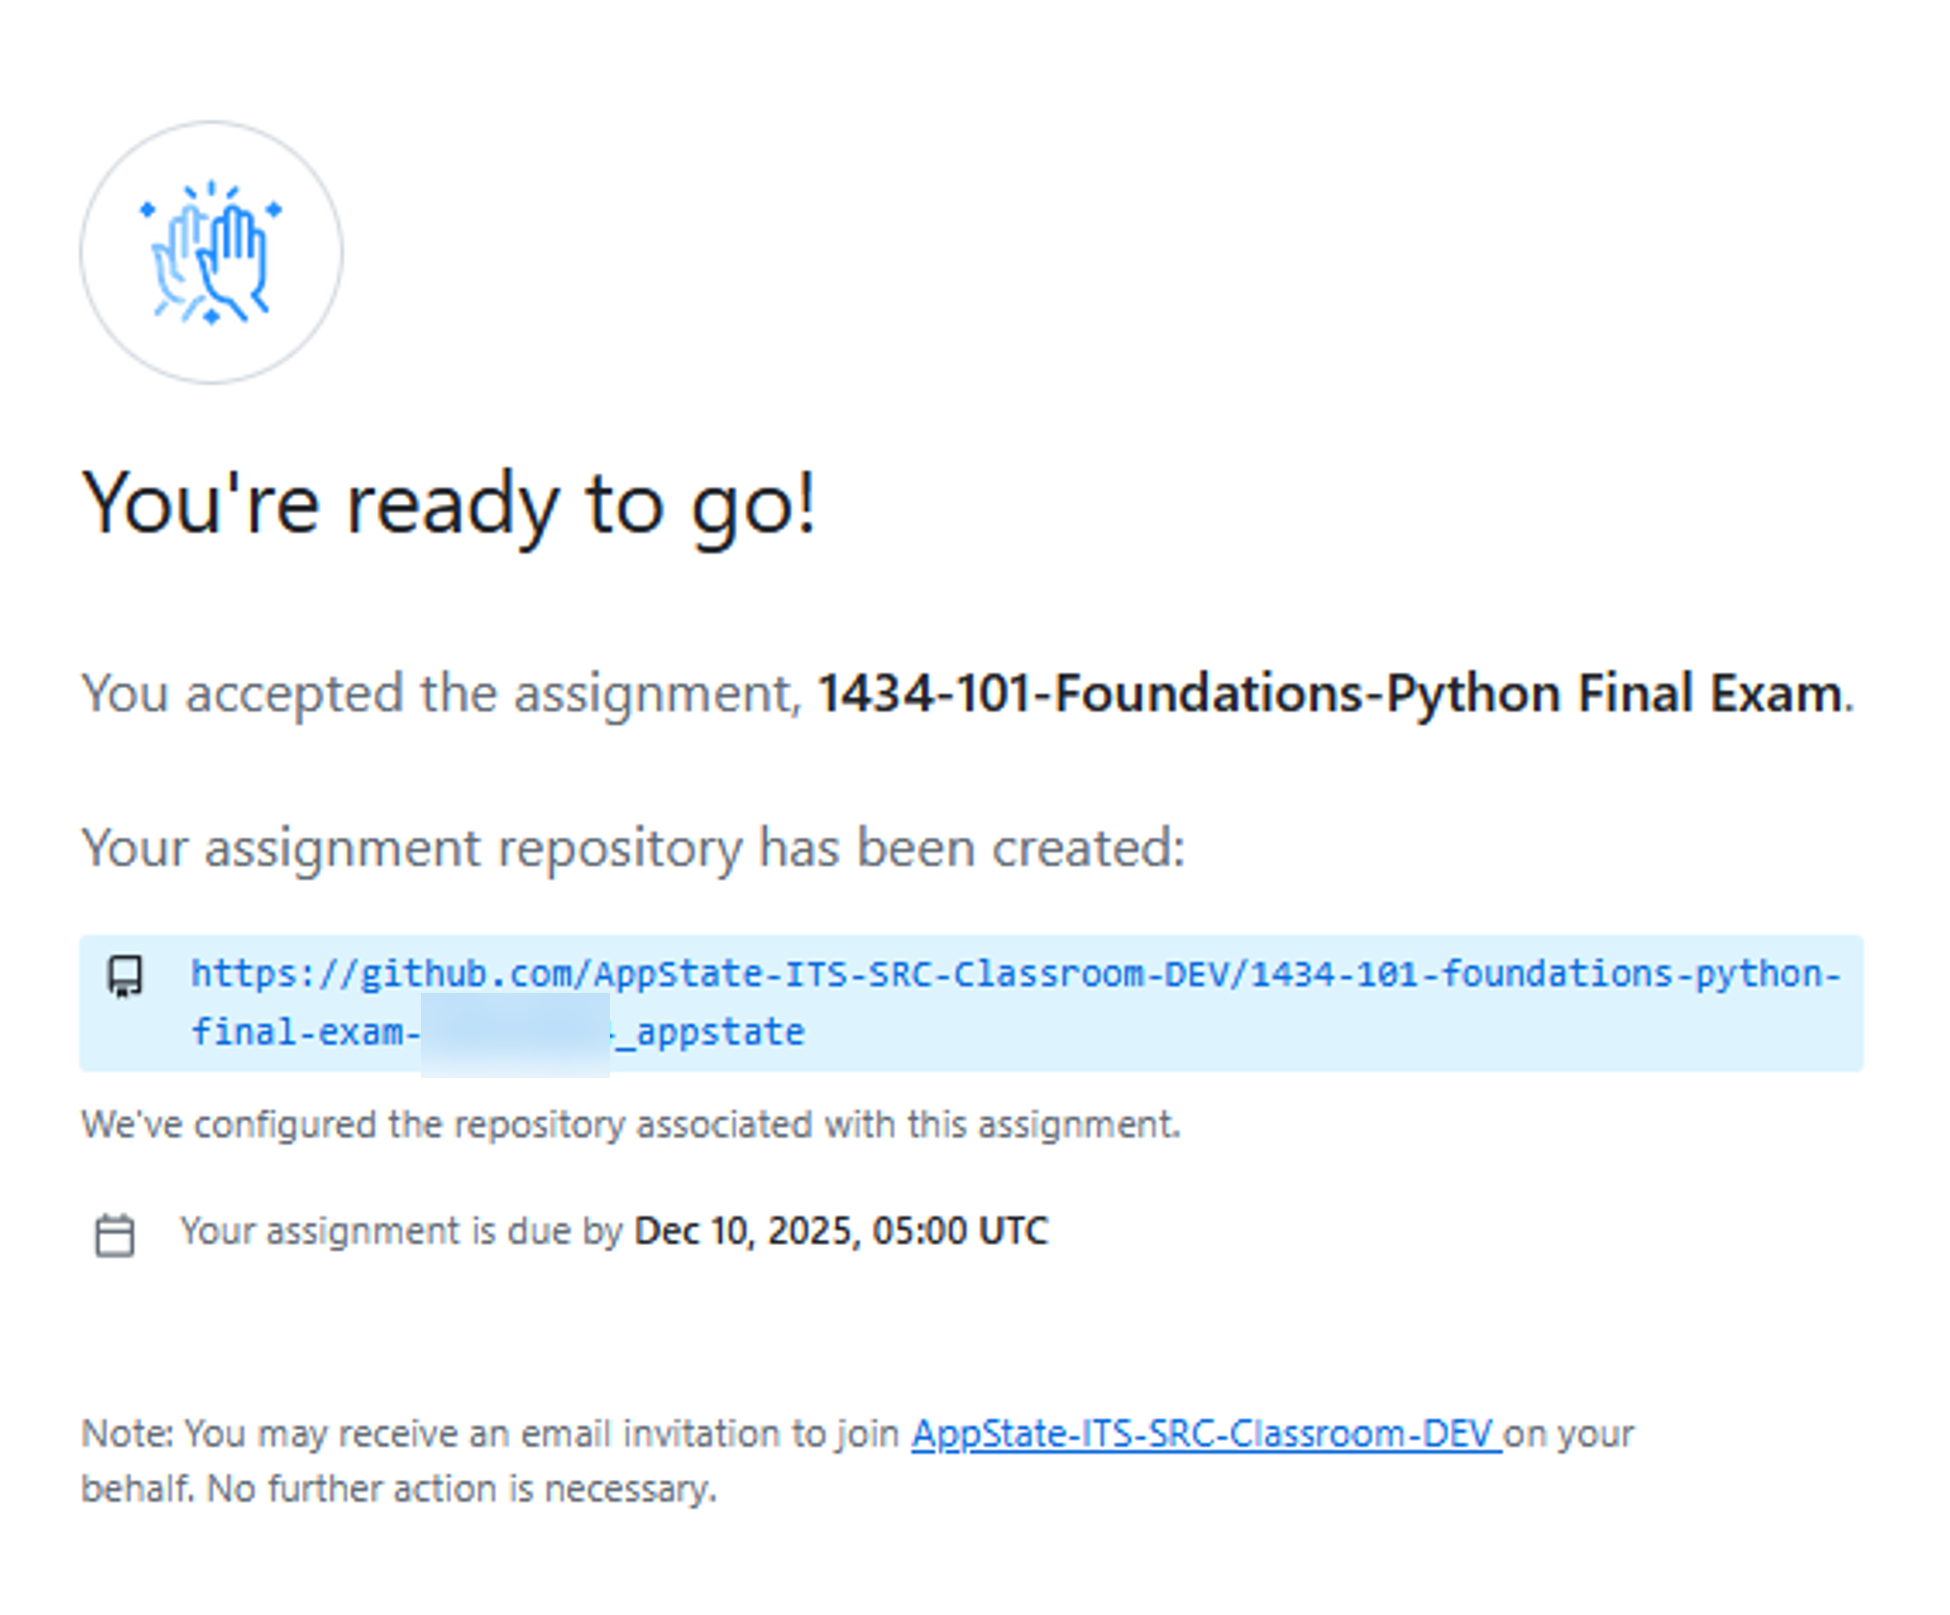
- They work on the assignment and commit their changes to their repository.

- Students can submit their work using pull requests, allowing for instructor feedback and collaboration.
Grading options
- Feedback Pull Requests - Enable feedback pull requests in assignment settings. GitHub will create a pull request for each student, add line-by-line comments, and the student can see the feedback immediately.
- Repository Review - Instructors can browse student repositories, review their code, and add comments via issue.
- Autograding - Configure tests that run automatically when students push:
Unit tests (pytest, JUnit, etc.)
Command testS
- I/O tests
Results: Pass/fail will be visible in the student repository.
- Download All - Use GitHub Classroom Assistant to download all repos at once and grade locally.
Managing Classes
- Add TAs - In your organization, click on People and invite a user with owner/member access.
- Late Submissions - Deadlines are informational only. Check commit timestamps to determine on-time submissions.
- Group Projects - Create group assignments by setting the team size. Students will form teams when accepting.
Common Issues
- Student can't accept: Verify they have a username_appstate account and that they have authorized GitHub Classroom.
- Code won't run: Check that they've committed and pushed (not just saved locally).
- Autograding fails: Test locally first, then verify timeout settings.
Best Practices
- Clear instructions: Detailed README in template
- Test as a student: Create the assignment as a student first
- Monitor progress: Check acceptance rate before deadline
- Use autograding: Automate objective checks
- Batch grading: Grade all at once for consistency
Privacy
- Use private repositories (FERPA-compliant)
- Students can't see each other's work
- Students own their code after the semester
See the GitHub Classroom Docs to learn how to: