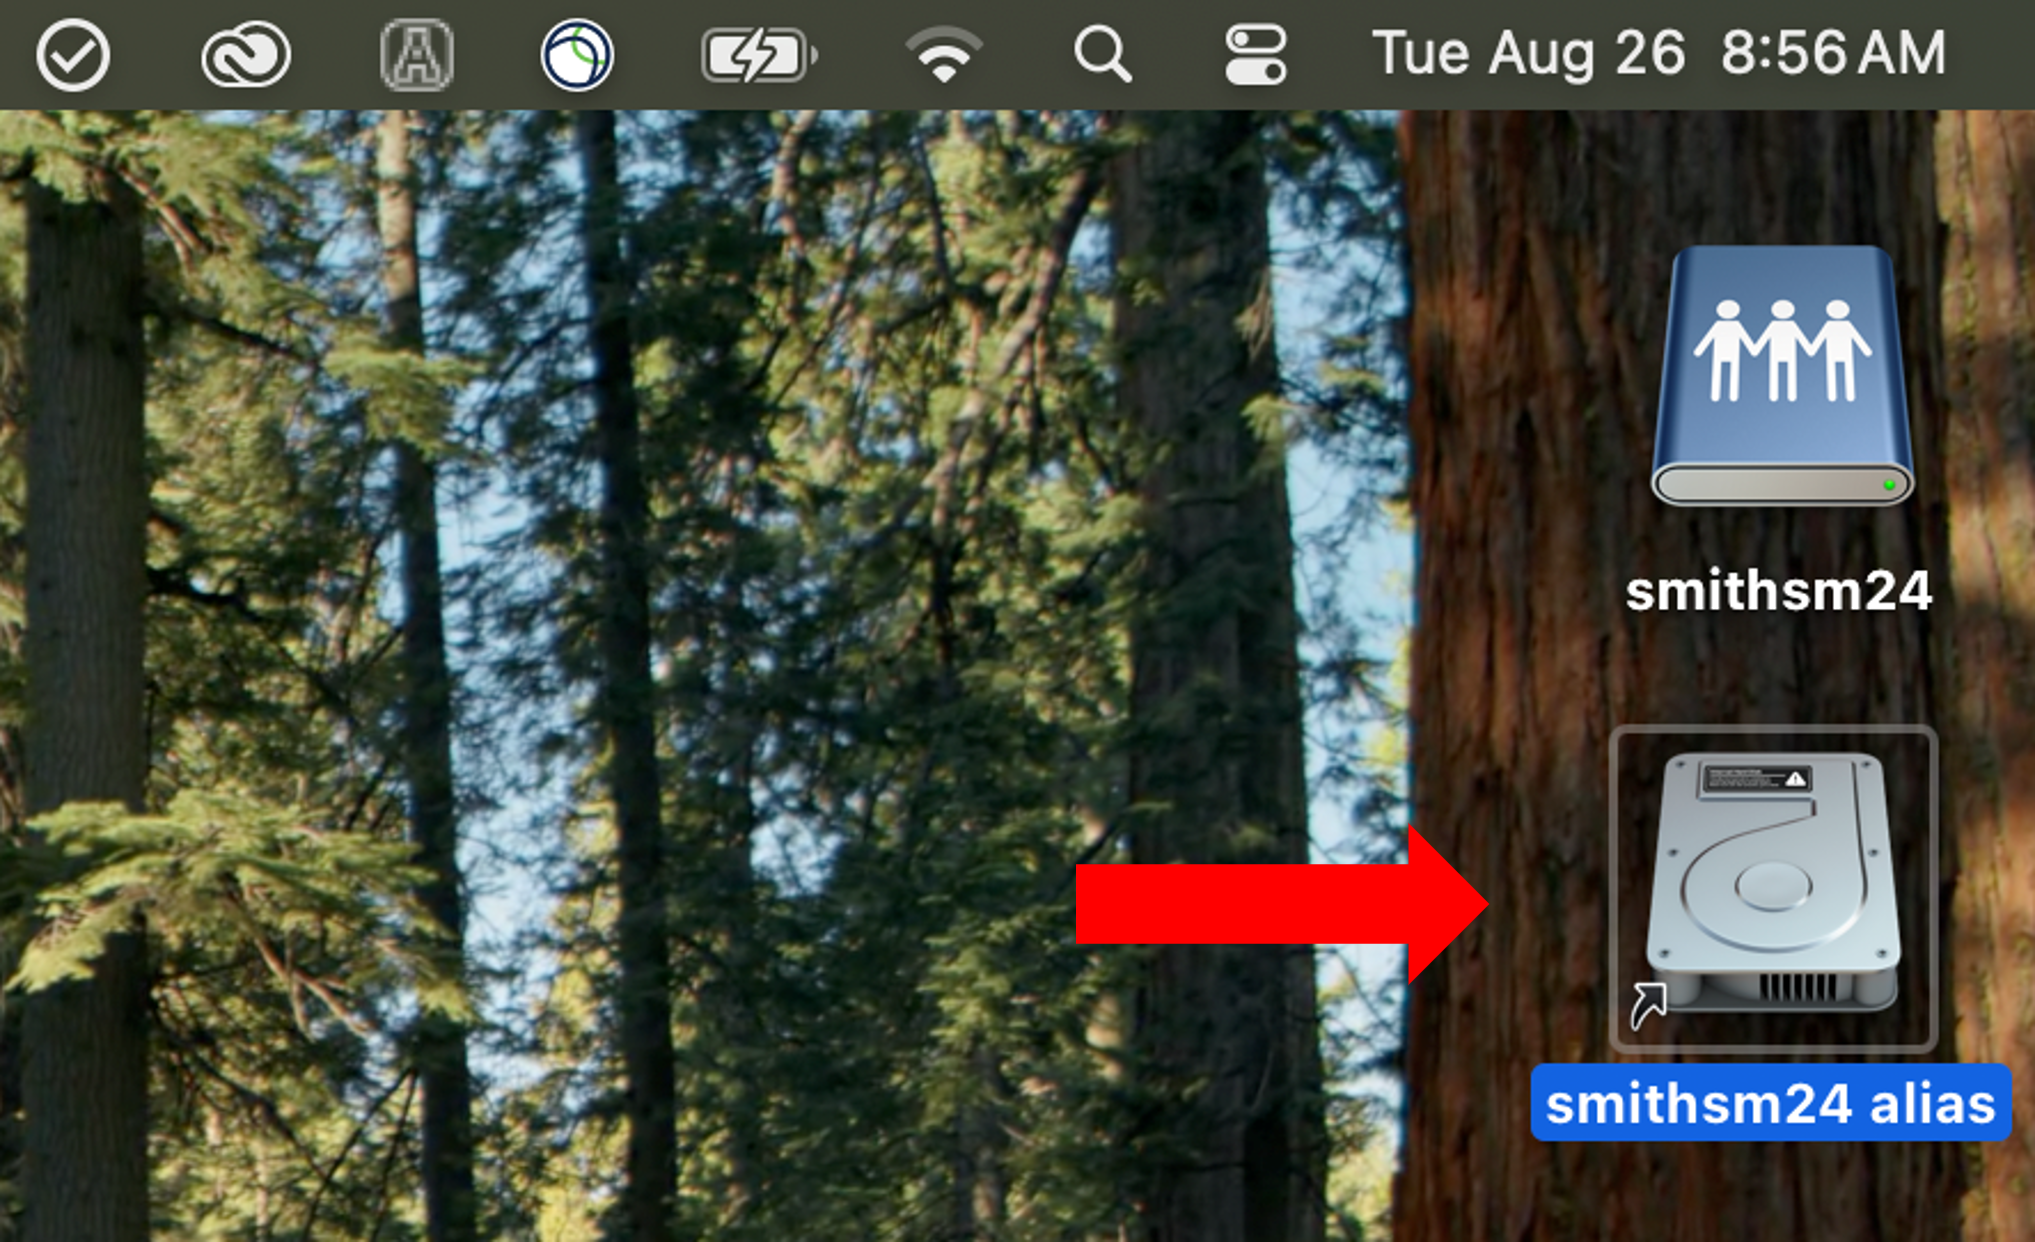
uStor is a network-based file storage solution for saving App State files off your computer. You will often hear this referred to the M drive or P drive by Windows users.
This guide will show you how to access the server directly on your Mac and create a uStor alias for easier access.
Note:
You must be connected to VPN in order to use uStor when not connected to the asu network. More information is available in our article on Work/Teach/Learn From Home.
Step-by-step guide
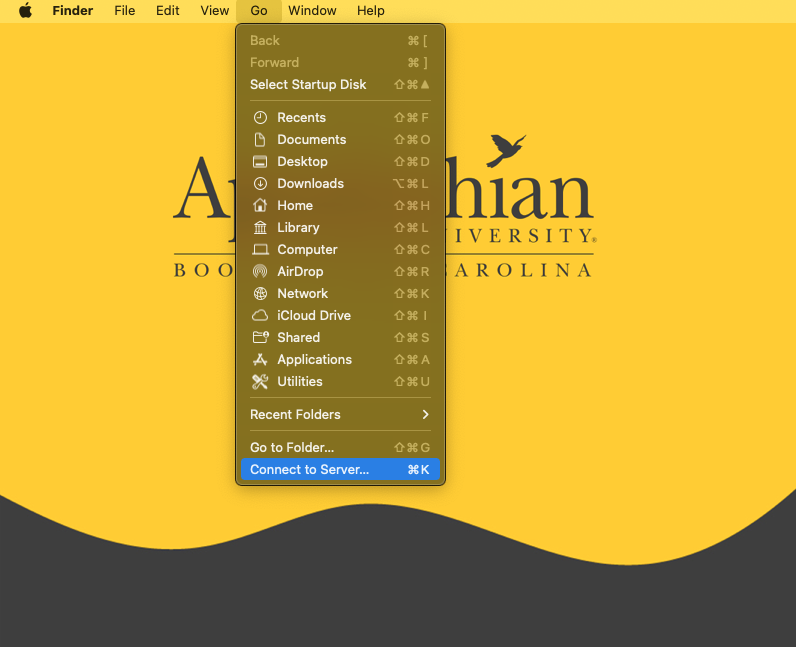
- In the Finder Menu Bar, click on Go, then Connect to Server....
- In the Server Address field, type the path to the uStor directory: smb://ustor.appstate.edu
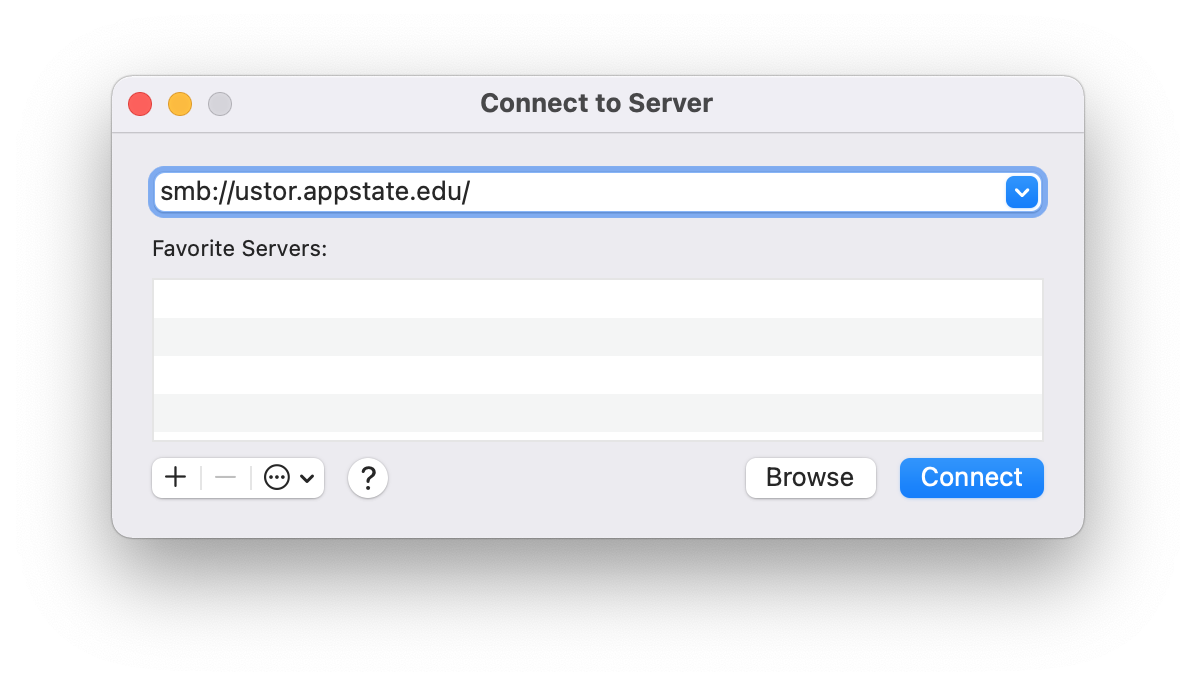
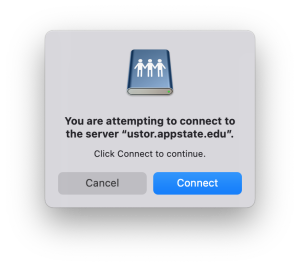
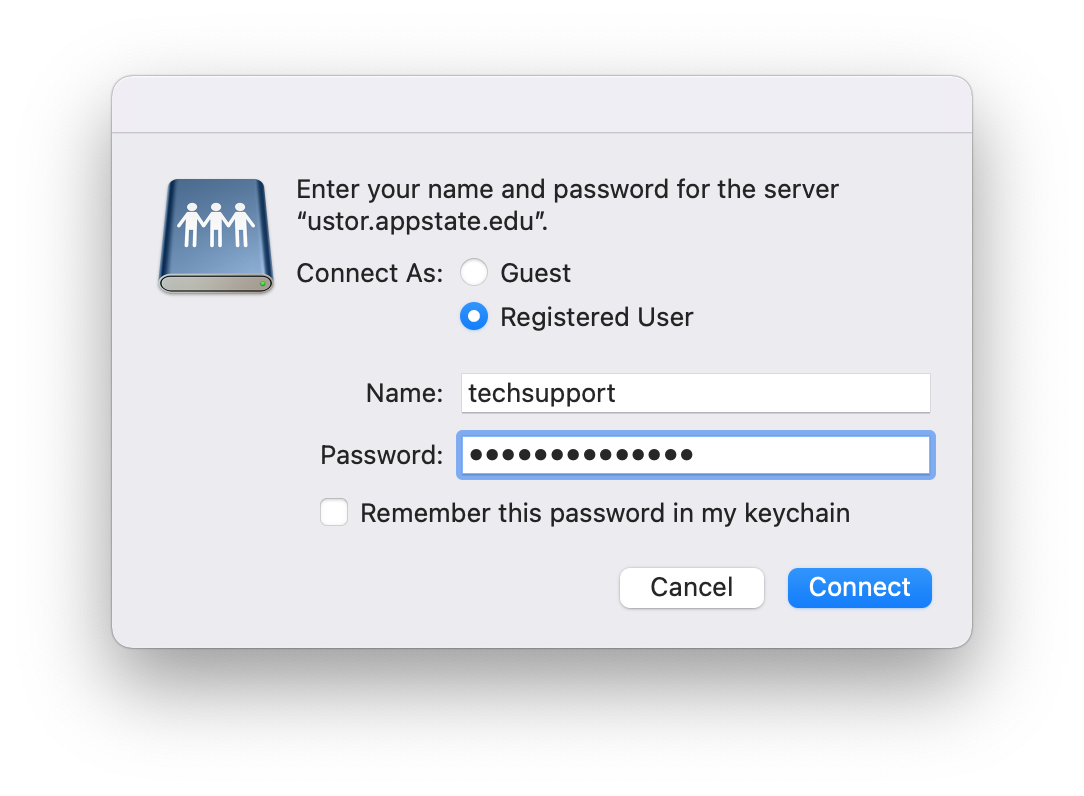
- Click Connect and log in with your App State credentials.
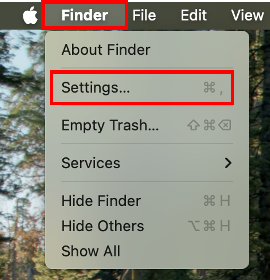
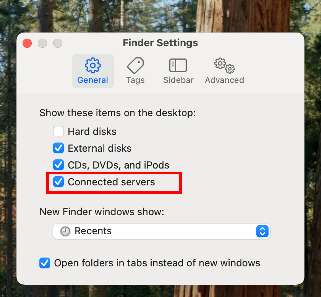
- Click Finder and go into Settings. Ensure that Connected servers is checked. This will mount the uStor folder on your desktop.
- Control + Click the drive and click Make Alias.
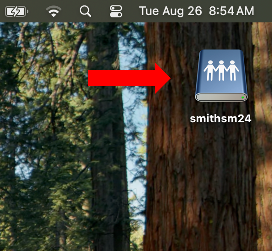
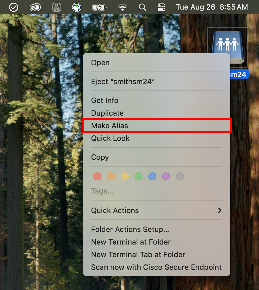
- You now have an alias of that uStor Share on your desktop that won't go away when you eject it or disconnect from the network. Feel free to rename the alias to something suitable for you.